Operation
Theme: Configure | Audience: System Administrator, Automation Engineer
What is it?
Once the connector has been registered with the OpCon system, you can define the link between the OpCon system and the AMT Batch Server. Once the link is defined and active, you can define Asysco AMT tasks that are submitted to the AMT Batch Server through the REST-API. All definitions can only be performed using Solution Manager.
Use this page when:
- You are setting up the link between OpCon and an AsyscoAMT Batch Server for the first time.
- You need to define AMT batch jobs and scripts as OpCon-managed tasks with scheduling and dependency control.
- You want to monitor AMT job status and retrieve execution logs from within OpCon.
Defining AsyscoAMT Batch Server connection
Before defining a communications link, an AsyscoAMT Batch User must first be created.
To add an AsyscoAMT Batch User, complete the following steps:
- Open Solution Manager.
- From the Home page, select Library.
- From the Security menu, select Batch Users.
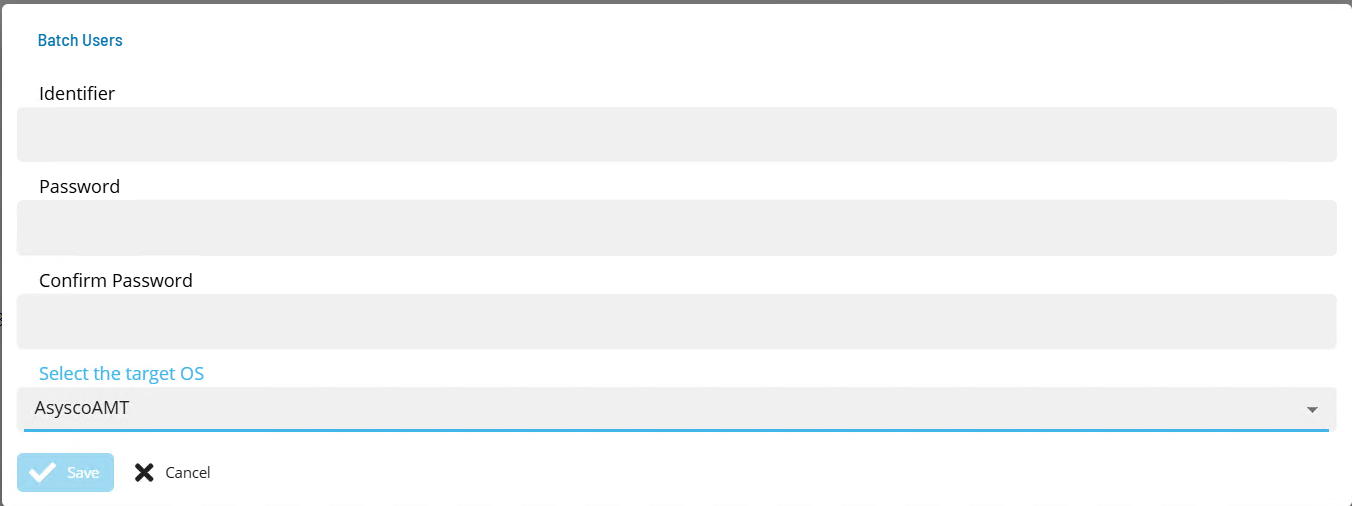
- Select the +Add button.
- Select AsyscoAMT from the Select the target OS list.
- In the Identifier field, enter the API user name used to retrieve an authentication token.
- In the Password field, enter the password.
- In the Confirm field, enter the password again.
- Select the Save button. The Batch User is saved.
The link between the OpCon system and the AsyscoAMT Batch Server is defined by adding a new AsyscoAMT agent definition using Solution Manager.
NOTE: Fields marked in red are required.
To define an AsyscoAMT agent connection, complete the following steps:
- Open Solution Manager.
- From the Home page, select Library.
- From the Administration menu, select Agents.
- Select the +Add button.
- In the Name field, enter a unique name for the connection.
- Select AsyscoAMT from the Type list.
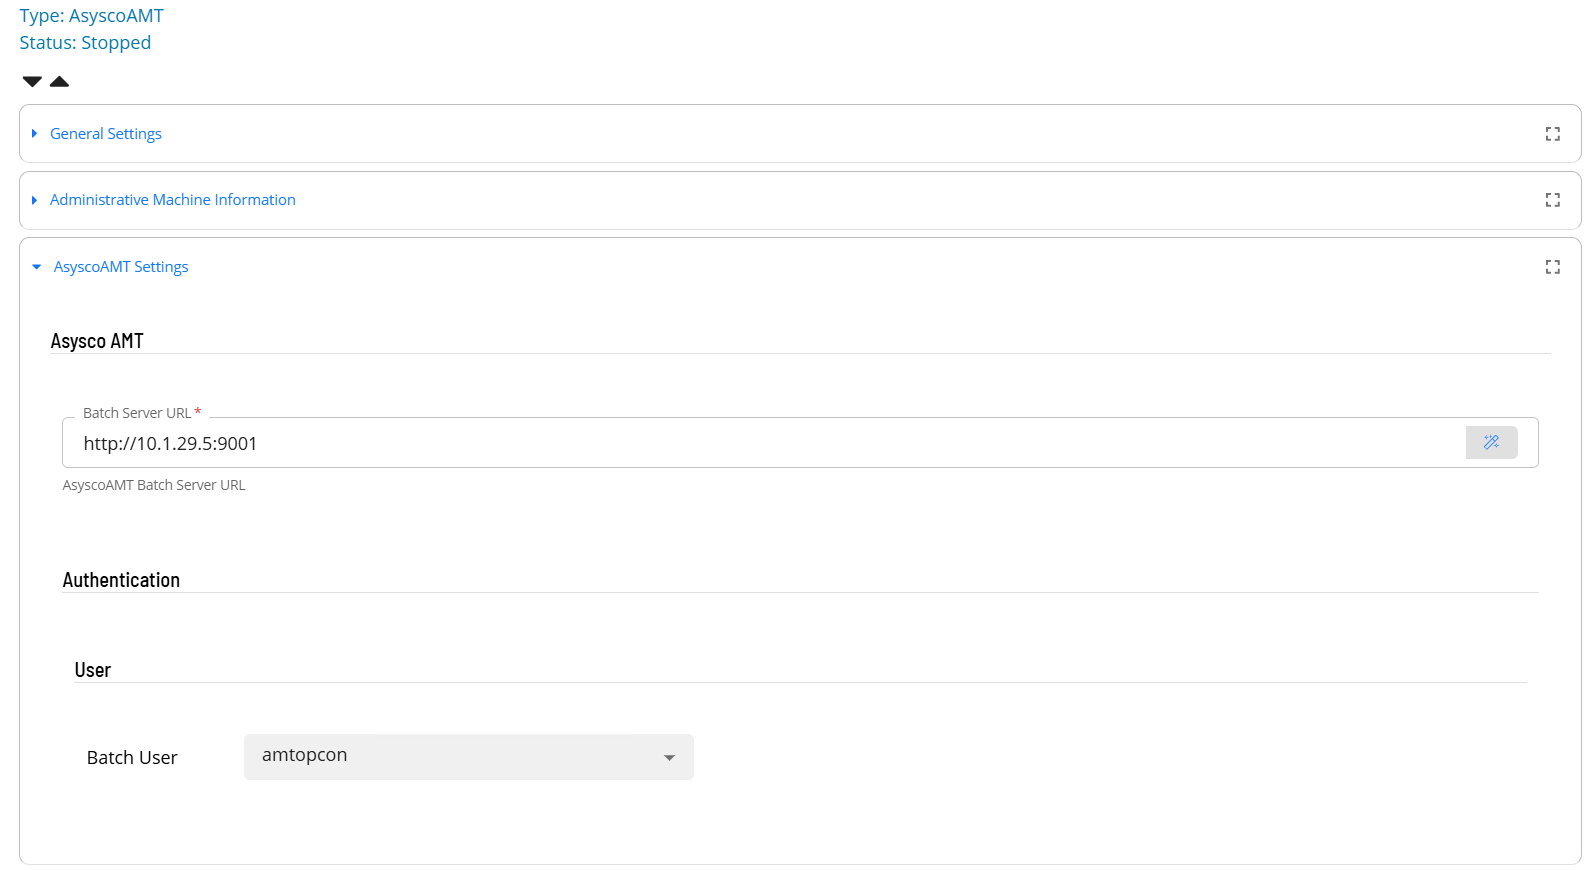
- Select AsyscoAMT Settings.
- In the Batch Server URL field, enter the URL of the AMT Batch Server including the port number (for example,
http://BatchServer:42000). - Select the API user from the Batch User list.
- In the Retain Log Files field, enter the number of days to keep job log files. The default is 30 days.
- Select the Save button.
- Select the Change Communication Status button and select Enable Full Comm.
- Select Administrative Machine Information.
- Set the Allow Kill Job field to True.
- Select the Save button.
- Select Communication Settings.
- Confirm the Requires XML Escape Sequences: User-Defined field is set to True. If it is not, update the field and select the Save button.
The agent connection to the AsyscoAMT Batch Server is active.
Defining tasks
The AsyscoAMT Connection supports two task types: Batch Job and Script.
To create an AsyscoAMT job, complete the following steps:
- Open Solution Manager.
- From the Home page, select Library.
- From the Administration menu, select Master Jobs.
- Select the +Add button.
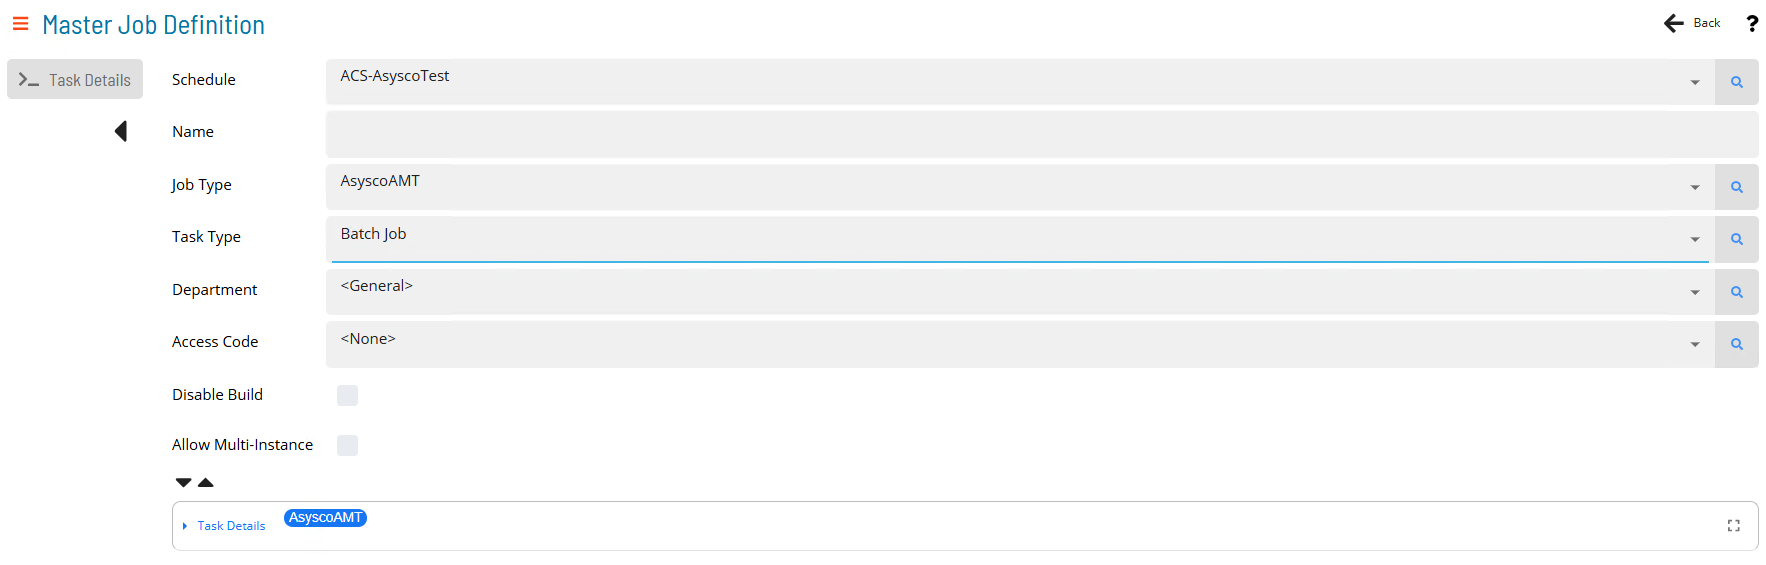
- Select the schedule name from the Schedule list.
- In the Name field, enter a unique name for the job within the schedule.
- Select AsyscoAMT from the Job Type list.
- Select the task type from the Task Type list.
Batch job
NOTE: Fields marked in red are required.

To configure the Batch Job task type, complete the following steps:
- Select the Task Details button.
- In the Integration Selection section, select the primary integration, which is an AsyscoAMT connection previously defined.
- In the Application Name field, enter the AMT Application Name. Most implementations have a single application installed with the AMT environment.
- Confirm the Submit User field is set to BATCH. Do not change this default value.
- (Optional) In the User field, enter the user that the AMT task will run as within the AMT Batch environment (RunAS). If not defined, the Application user is used.
- Confirm the Station field is set to OPCON. Do not change this default value.
- (Optional) In the Queue Name field, enter the queue within the AMT Batch Server where the task should be placed. If not defined, the AMT Batch Server default queue is used.
- In the Job Name field, enter the name of the task defined in the Asysco AMT Batch Server to execute.
- In the Task Values field, enter task values used to modify, override, or elaborate existing task attributes that apply to the job. For each task value, select the + Add Item button and enter the value.
The job is saved and ready for scheduling.
Script
NOTE: Fields marked in red are required.
To configure the Script task type, complete the following steps:
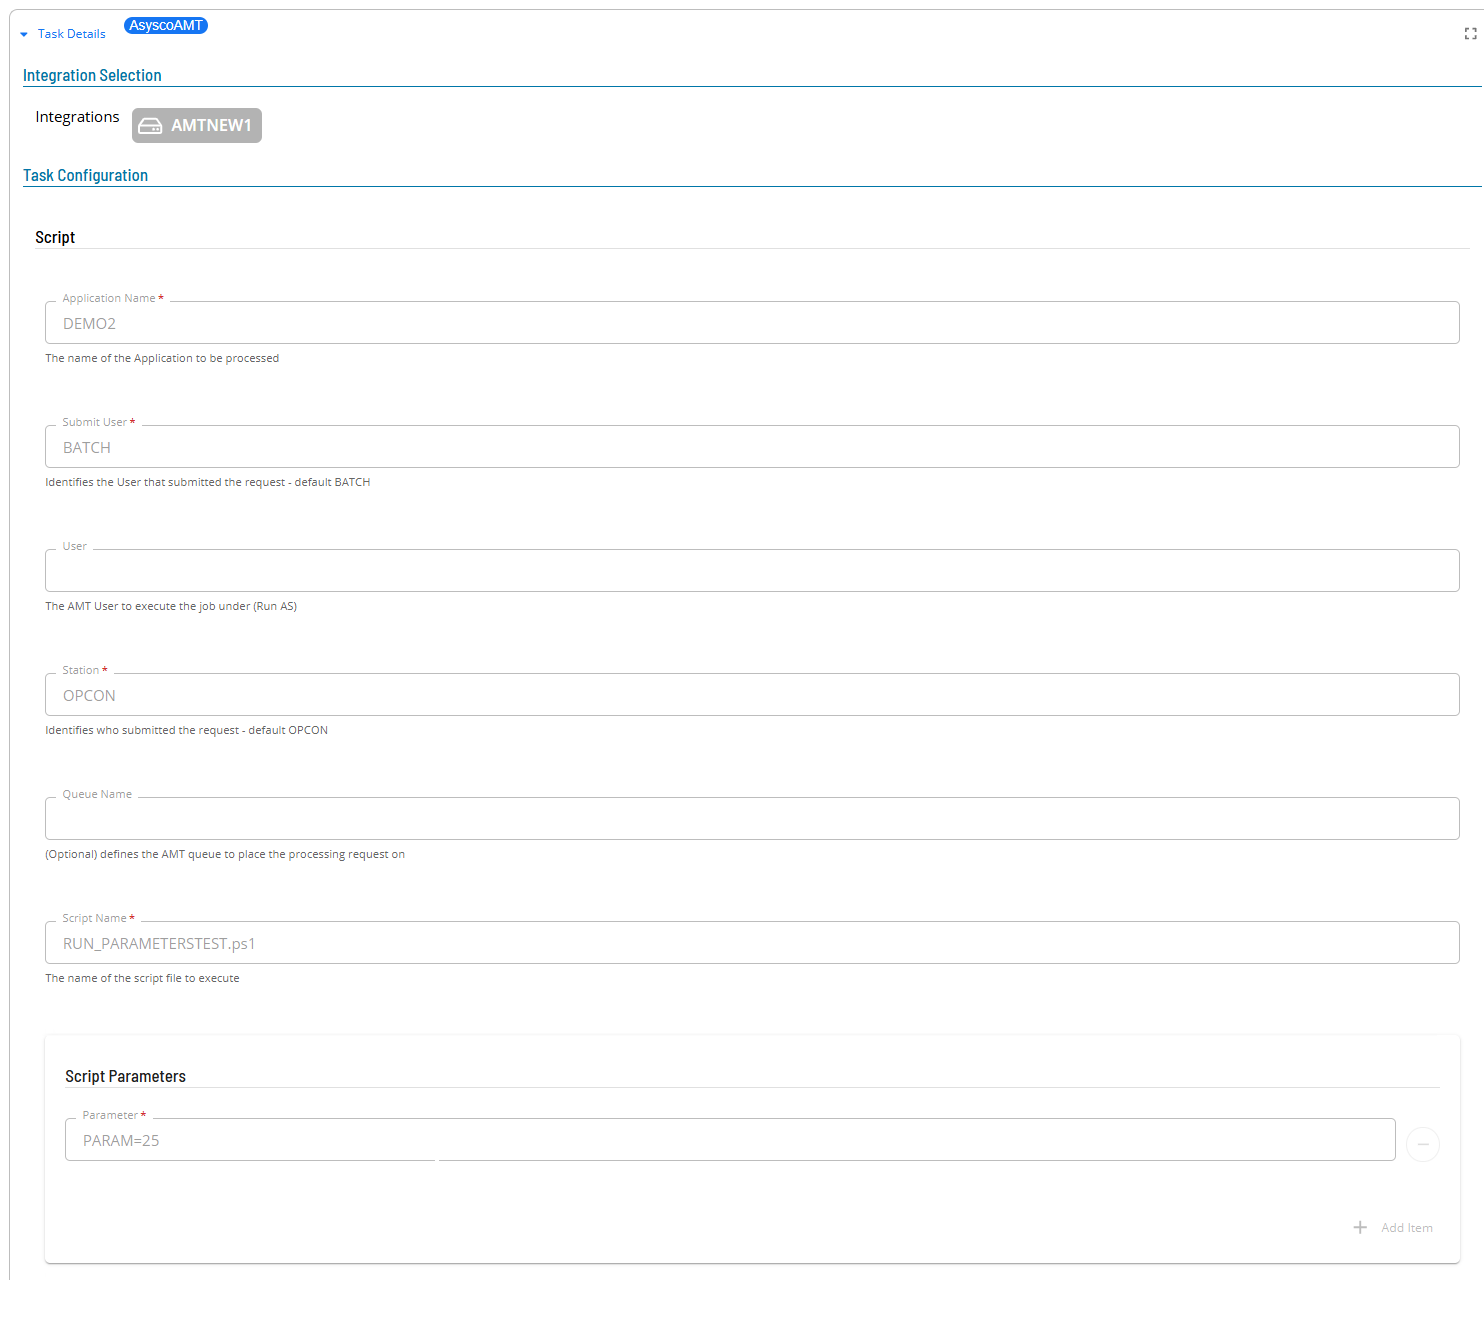
- Select the Task Details button.
- In the Integration Selection section, select the primary integration, which is an AsyscoAMT connection previously defined.
- In the Application Name field, enter the AMT Application Name. Most implementations have a single application installed with the AMT environment.
- Confirm the Submit User field is set to BATCH. Do not change this default value.
- (Optional) In the User field, enter the user that the AMT task will run as within the AMT Batch environment (RunAS). If not defined, the Application user is used.
- Confirm the Station field is set to OPCON. Do not change this default value.
- (Optional) In the Queue Name field, enter the queue within the AMT Batch Server where the task should be placed. If not defined, the AMT Batch Server default queue is used.
- In the Script Name field, enter the name of the script to execute on the Asysco AMT Batch Server.
- In the Script Parameters field, enter parameters to be passed to the task. Values are defined as name=value pairs. For each parameter, select the + Add Item button and enter the parameter.
The job is saved and ready for scheduling.
Configuration options
Batch User settings
| Setting | What It Does | Default | Notes |
|---|---|---|---|
| Target OS | OS type for the batch user | — | Must be set to AsyscoAMT |
| Identifier | API user name used to retrieve an authentication token | — | Required |
| Password | Password for the API user | — | Required; stored encrypted |
Agent connection settings
| Setting | What It Does | Default | Notes |
|---|---|---|---|
| Name | Unique identifier for the connection within OpCon | — | Required |
| Type | Agent type selector | — | Must be set to AsyscoAMT |
| Batch Server URL | URL of the AsyscoAMT Batch Server including the port number | — | Required; for example, http://BatchServer:42000 |
| Batch User | API user credential for authenticating with the AMT Batch Server | — | Required |
| Retain Log Files | Number of days to keep job log files | 30 | — |
| Allow Kill Job | Enables the ability to terminate a running task from OpCon | — | Must be set to True |
| Requires XML Escape Sequences | Ensures special characters in job parameters are properly escaped | — | Must be set to True |
Common job settings (Batch Job and Script)
| Setting | What It Does | Default | Notes |
|---|---|---|---|
| Integration Selection | Selects the AsyscoAMT agent connection to use | — | Required |
| Application Name | AMT Application Name for the target environment | — | Required |
| Submit User | User that submits the job to the AMT Batch Server | BATCH | Do not change this value |
| User | AMT user the task runs as within the AMT Batch environment (RunAS) | Application user | Optional |
| Station | Identifies the submitting system within AMT | OPCON | Do not change this value |
| Queue Name | AMT Batch Server queue where the task is placed | AMT default queue | Optional |
Batch Job settings
| Setting | What It Does | Default | Notes |
|---|---|---|---|
| Job Name | Name of the task defined in the AMT Batch Server to execute | — | Required |
| Task Values | Name=value pairs that modify, override, or elaborate existing task attributes | — | Optional; add one value per row |
Script settings
| Setting | What It Does | Default | Notes |
|---|---|---|---|
| Script Name | Name of the script to execute on the AMT Batch Server | — | Required |
| Script Parameters | Parameters passed to the script as name=value pairs | — | Optional; add one parameter per row |
Related topics: