Define the ACS Kubernetes Connector agent
Theme: Configure
Who Is It For? System Administrator, Automation Engineer
What is it?
Before OpCon can submit jobs to a Kubernetes cluster, you must define two objects in Solution Manager: a KubernetesJob script that holds the cluster connection configuration, and an agent definition that references that script.
- Use this procedure when setting up the connector for the first time in a new OpCon environment
- Use this procedure when connecting to a new Kubernetes cluster that does not yet have a script or agent defined
All definitions are performed in Solution Manager.
Define KubernetesJob scripts
The connector uses a script to store the .kube/config file that defines the Kubernetes cluster connection. You must create a script type, a script runner, and the script itself before defining the agent.
To define the KubernetesJob script type and runner, complete the following steps:
- In Solution Manager, select Library.
- Select Scripts.
- Select Script Types from the upper right corner.
- Select +Add.
- In the Name field, enter
KubernetesJob. - In the File Extension field, enter
txt. - In the Description field, enter
Used for ACS KubernetesJob Integration. - Select the Save button.
- Select Script Runners from the upper right corner.
- Select +Add.
- In the Name field, enter
KubernetesJob. - In the OS field, select KubernetesJob from the list.
- In the Type field, select KubernetesJob from the list.
- In the Command field, enter
cmd.exe /c. - Select the Save button.
To create the connector configuration script, complete the following steps:
- In Solution Manager, select Library.
- Select Scripts.
- Select Scripts from the upper right corner.
- Select +Add.
- In the Name field, enter a name for the script. The recommended convention is to append
_configto the intended agent name. - In the Type field, select KubernetesJob from the list.
- Assign the required roles.
- In the Script area, paste the full contents of the
.kube/configfile for your cluster. - Select the Save button.
The following example shows the structure of a .kube/config file:
apiVersion: v1
clusters:
- cluster:
    certificate-authority-data:
    *************
    server: https://kubernetes.docker.internal:6443
  name: docker-desktop
contexts:
- context:
    cluster: docker-desktop
    user: docker-desktop
  name: docker-desktop
current-context: docker-desktop
kind: Config
users:
- name: docker-desktop
  user:
    client-certificate-data:
    *************
    client-key-data:
    *************
Define the ACS Kubernetes Connector agent
After the script is created, define the agent in Solution Manager.
To define the agent, complete the following steps:
- In Solution Manager, select Library.
- From the Administration menu, select Agents.
- Select +Add.
- In the Name field, enter a unique name for the connection.
- In the Type field, select Kubernetes Job from the list.
- Select General Settings.
- Verify that the NetCom Name field is set to Default, or enter the name of the SMA Relay if a relay is in use.
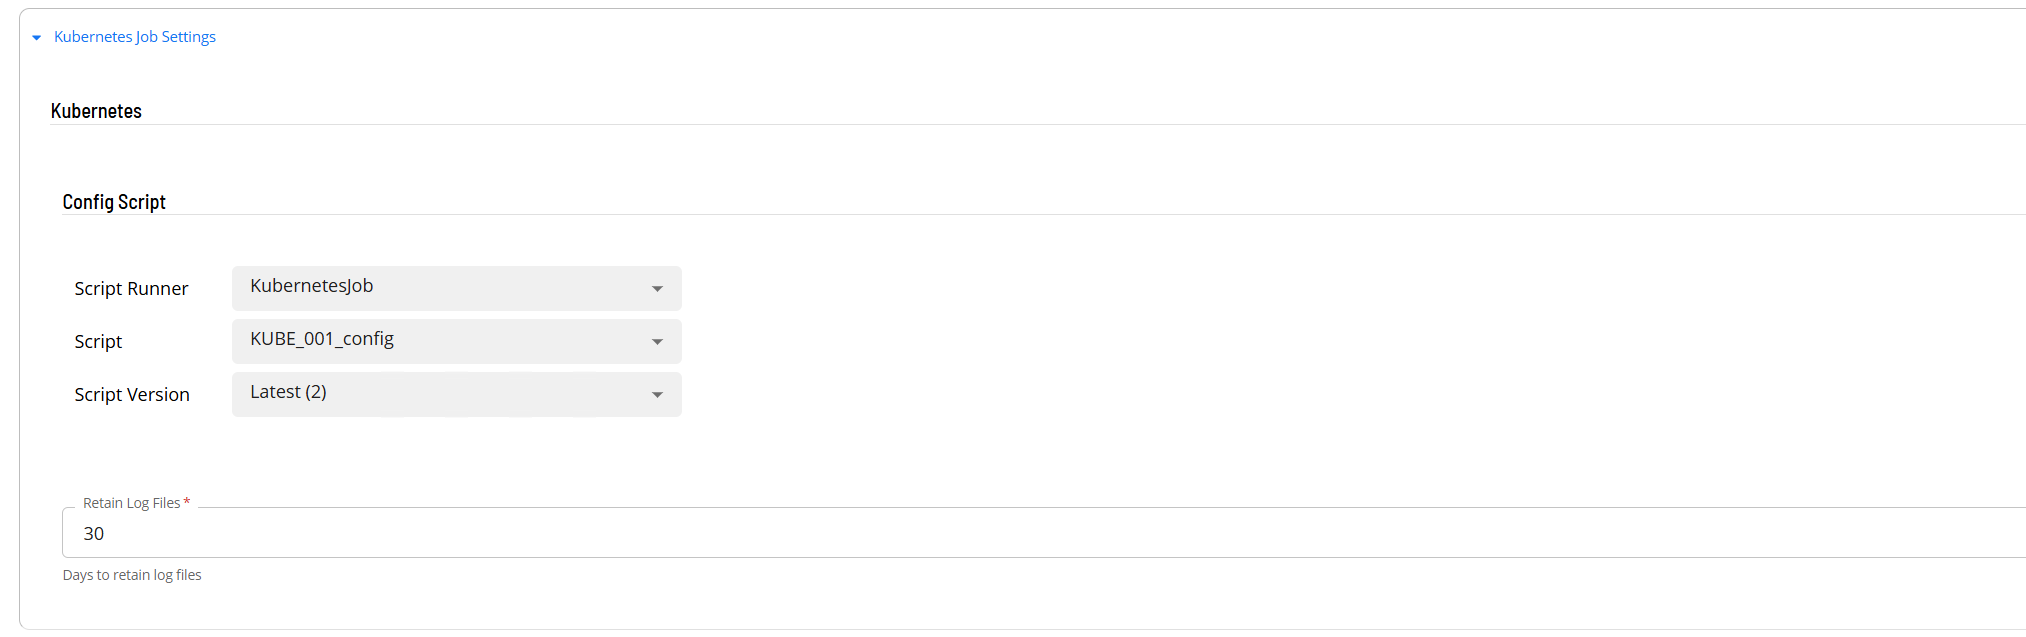
- Select Kubernetes Job Settings.
- In the Config Script field, select the script that contains the
.kube/configinformation. - In the Retain Log files field, enter the number of days to retain log files.
- Select the Save button.
- Select Communication Settings.
- Verify that the Requires XML Escape Sequences: User-Defined field is set to True. If it is not, set it to True and select the Save button.
- Select the Change Communication Status button and select Enable Full Comm. The agent connection is established.
FAQs
Where do I get the .kube/config file?
The .kube/config file is provided by your Kubernetes cluster administrator. It contains the cluster endpoint, authentication certificates, and context definitions required to connect to the cluster.
Can I define multiple agents for different Kubernetes clusters?
Yes. Create a separate script and agent definition for each cluster. Each agent uses its own .kube/config script to establish an independent cluster connection.
What does the NetCom Name field control?
The NetCom Name field determines which OpCon communication channel the agent uses. Use Default for standard on-premises deployments. If your environment routes agent communication through a named relay, enter the relay name here.
Why must XML escape sequences be enabled?
Kubernetes job definitions include YAML content that contains characters such as <, >, and & that must be escaped when transmitted through the OpCon communication protocol. Enabling this setting ensures those characters are transmitted correctly.
Glossary
NetCom — The OpCon network communication layer that handles message exchange between the OpCon server and agents.
.kube/config — The Kubernetes client configuration file that defines cluster endpoints, user credentials, and context settings. The connector uses this file to authenticate and communicate with the cluster.
Script Repository — The OpCon library where reusable scripts are stored and versioned. Scripts can be assigned roles for access control and referenced from agent and job definitions.