Define the ACS FiservDNA Agent Connection
Theme: Configure | Audience: System Administrator, Automation Engineer
Prerequisites
Before defining the agent connection, complete the following:
Open the agent definition form
The agent definition defines the information included in the generated SMARunJobDNA.ini file. Items highlighted in red are required. Global properties are supported.
To open the agent definition form, complete the following steps:
- Open Solution Manager.
- From the Home page select Library.
- From the Administration menu select Agents.
- Select +Add to add a new agent definition.
- Insert a unique name for the connection.
- Select Fiserv DNA from the Type list.
- Select General Settings. Check that the NetCom Name is set to Default or the SMA Relay name if Relay is being used.
- Select Fiserv DNA Settings and complete the sections below.
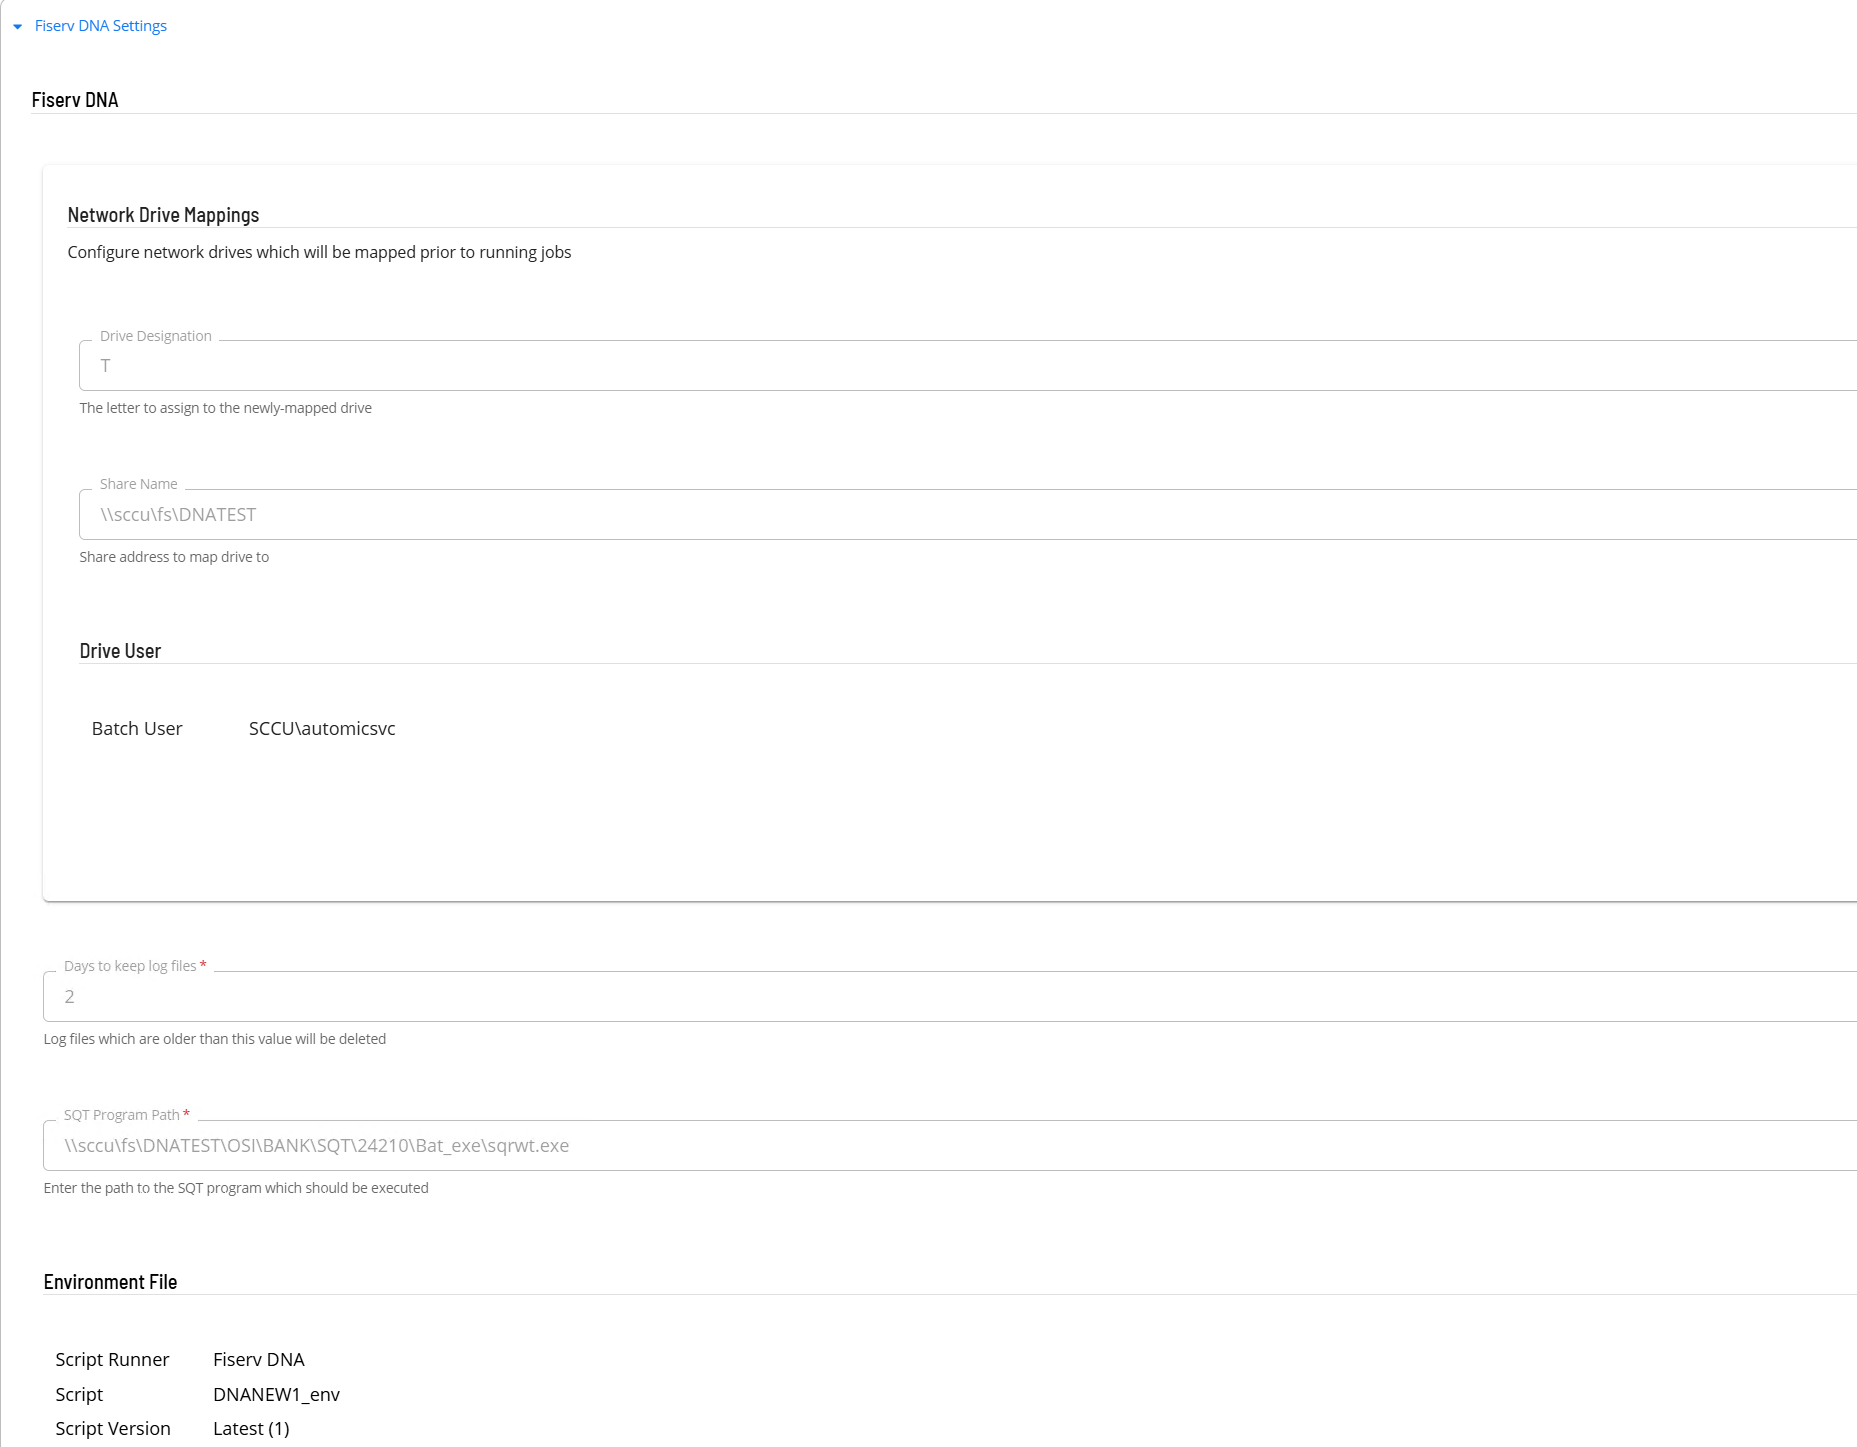
Fiserv DNA Settings
Network Drive Mappings
- In the Drive Designation field enter the letter assigned to the mapped drive.
- In the Share Name field enter the address of the drive mapping.
- In the Drive User field select the batch user to be used for the drive mapping.
Program and File Settings
- In the Days to Keep Log files field enter the value indicating how long log files should be retained.
- In the SQT Program Path field enter the path to the SQT program which should be executed.
- In the Environment File section select the script containing the environment information.
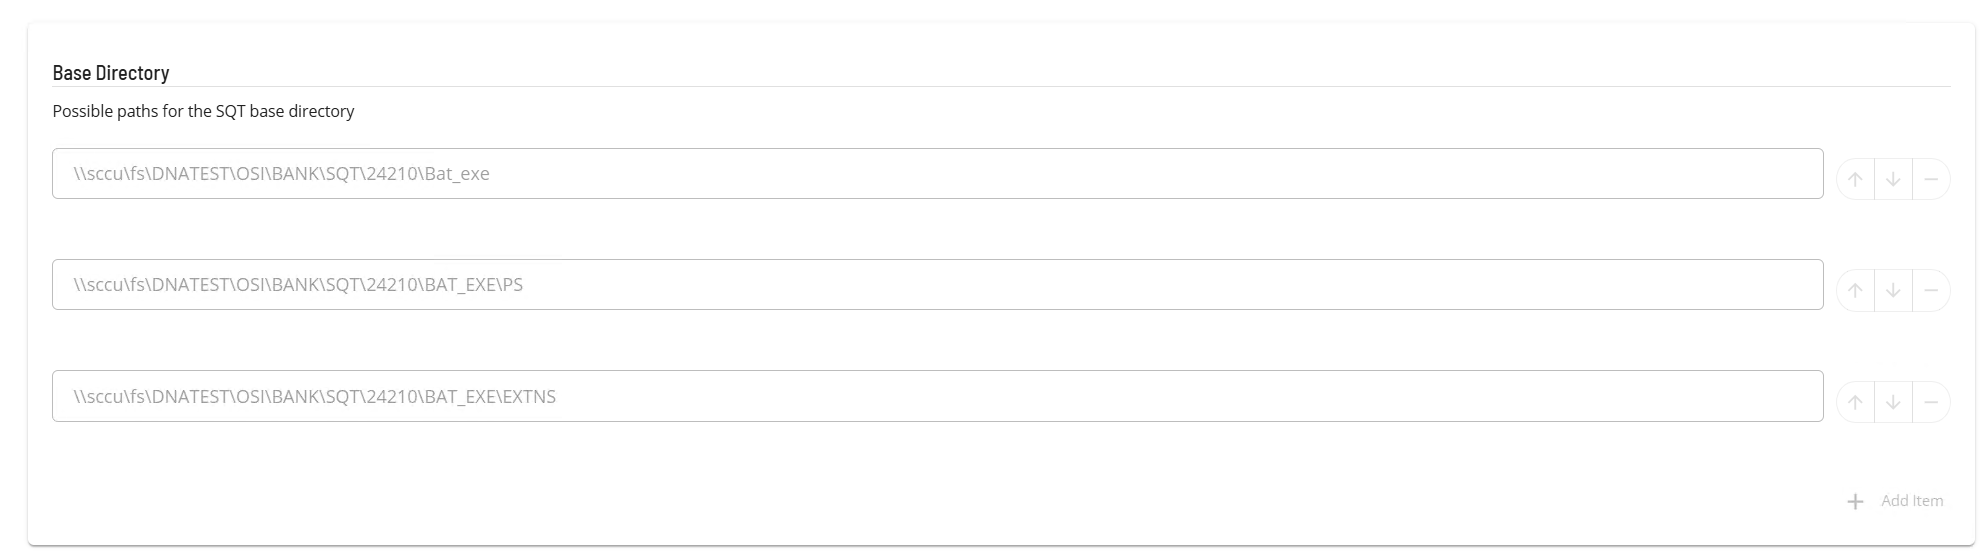
- In the Base Directory section enter the possible paths for SQT base directory. Use the + AddItem button to add values.
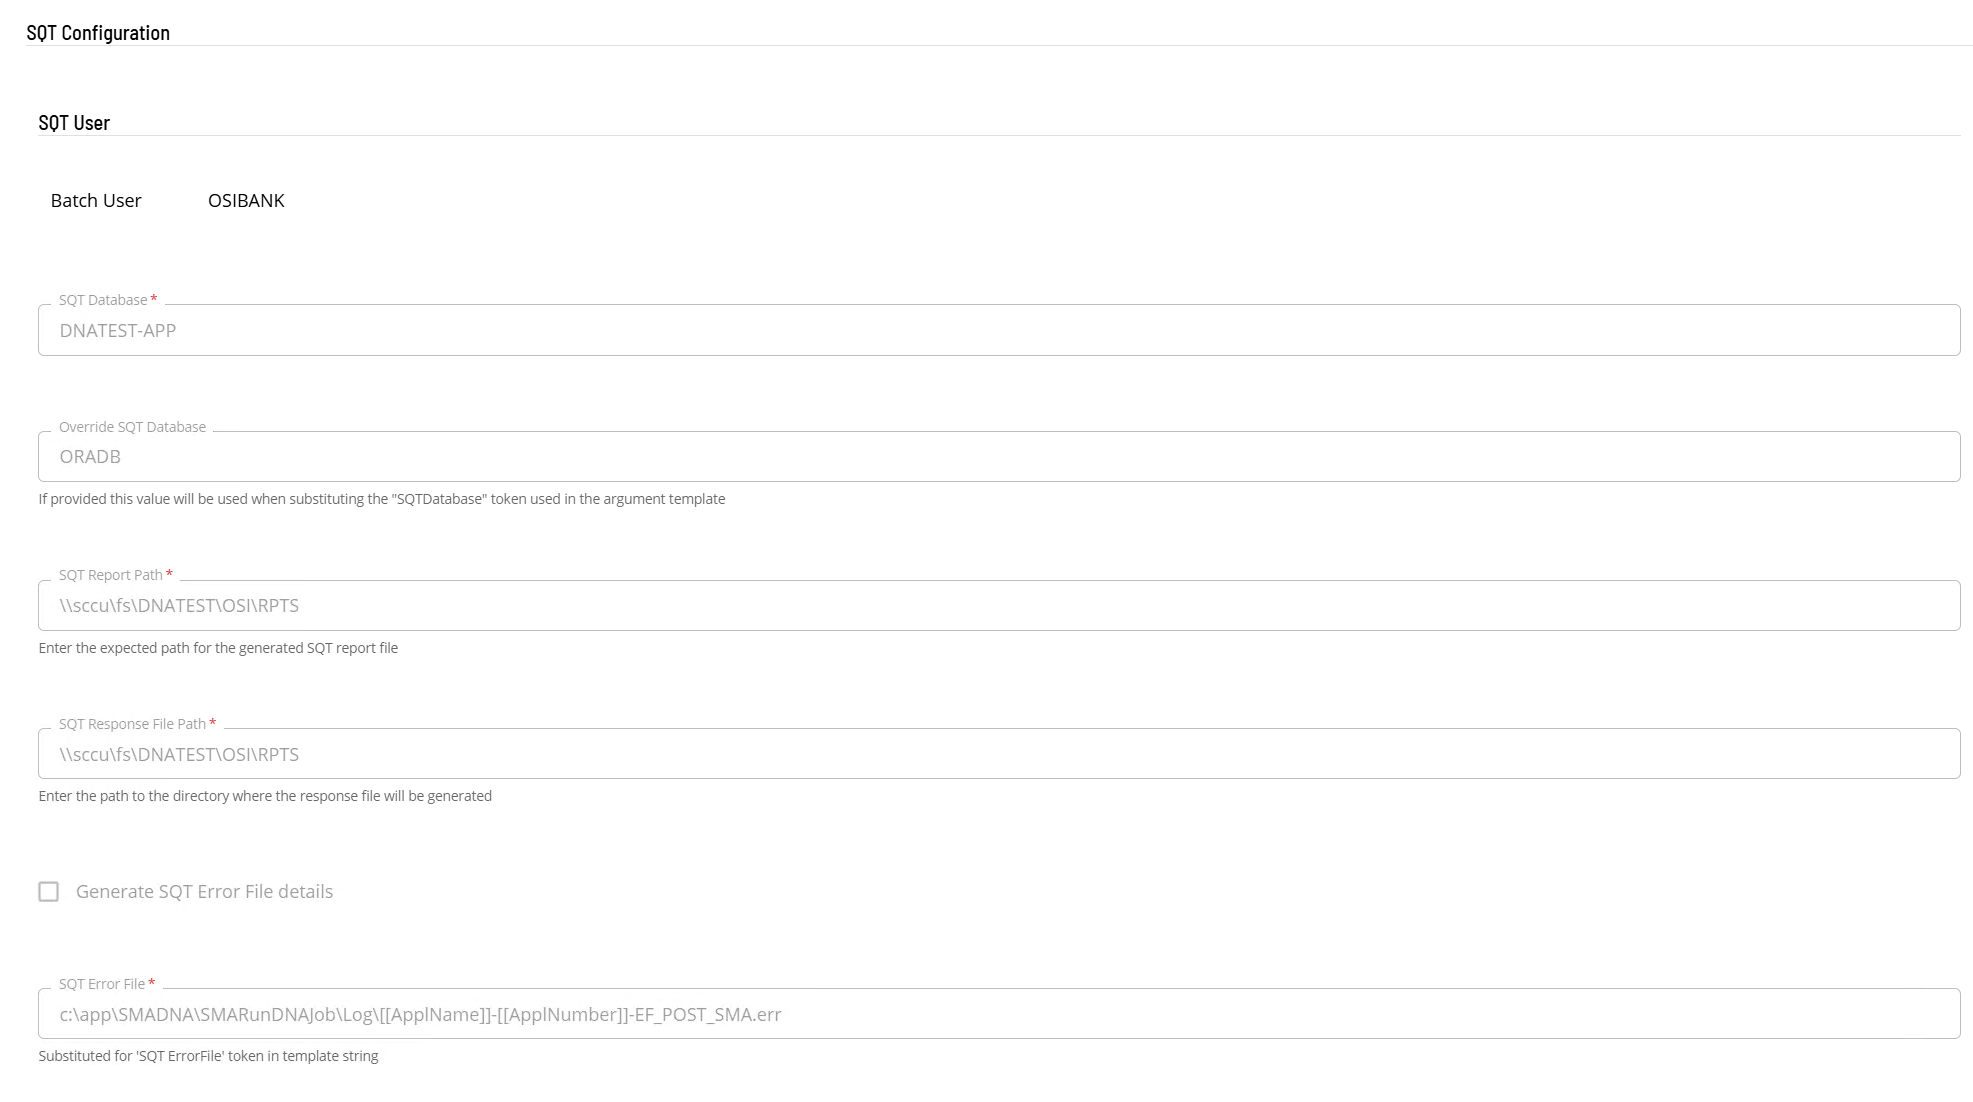
SQT Configuration
- In the SQT User field select the batch user to be used for SQT.
- In the SQT Database field enter the SQT database name.
- In the Override SQT Database field enter the override SQT database name.
- In the SQT Report Path field enter the expected directory for the generated SQT report file.
- In the SQT Response File Path field enter the path to the directory where the response file will be generated.
- If required, select Generate SQT Error File details.
- In the SQT Error File field enter the template string.
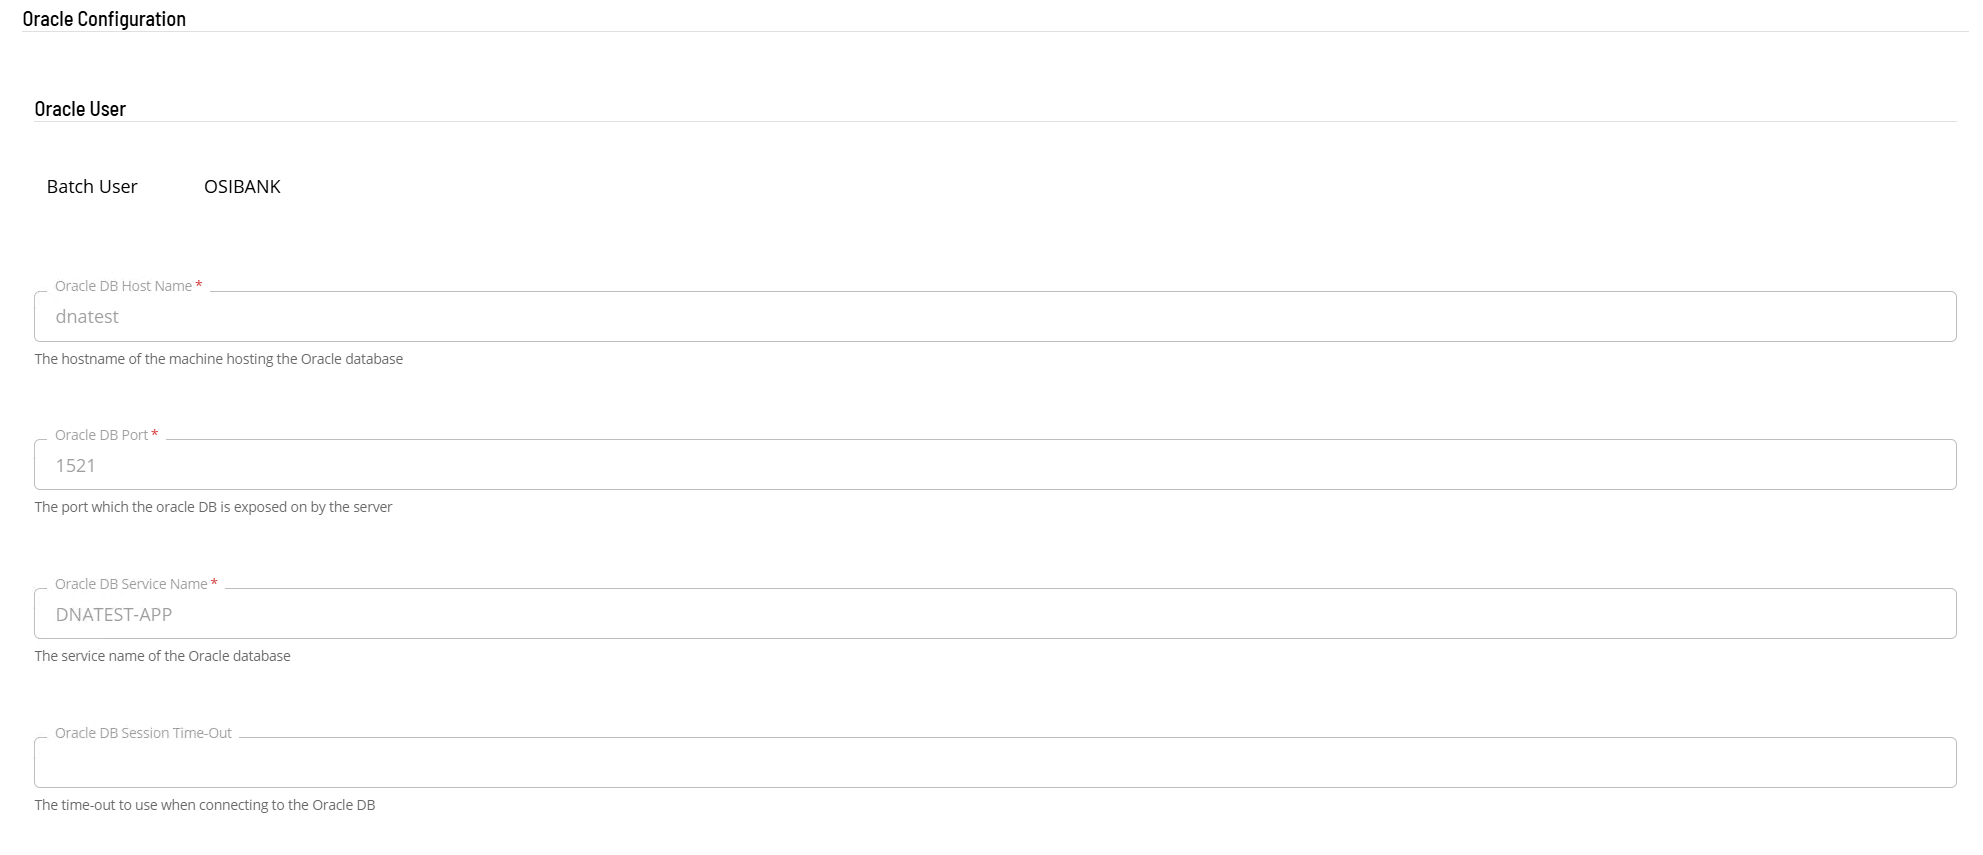
Oracle Configuration
- In the Oracle User field select the batch user to be used for the Oracle configuration.
- In the Oracle DB Port field enter the port on which the Oracle database is exposed.
- In the Oracle DB Service Name field enter the service name of the Oracle database.
- In the Oracle DB Session Time-Out field enter a time out value to use when connecting to the Oracle database.
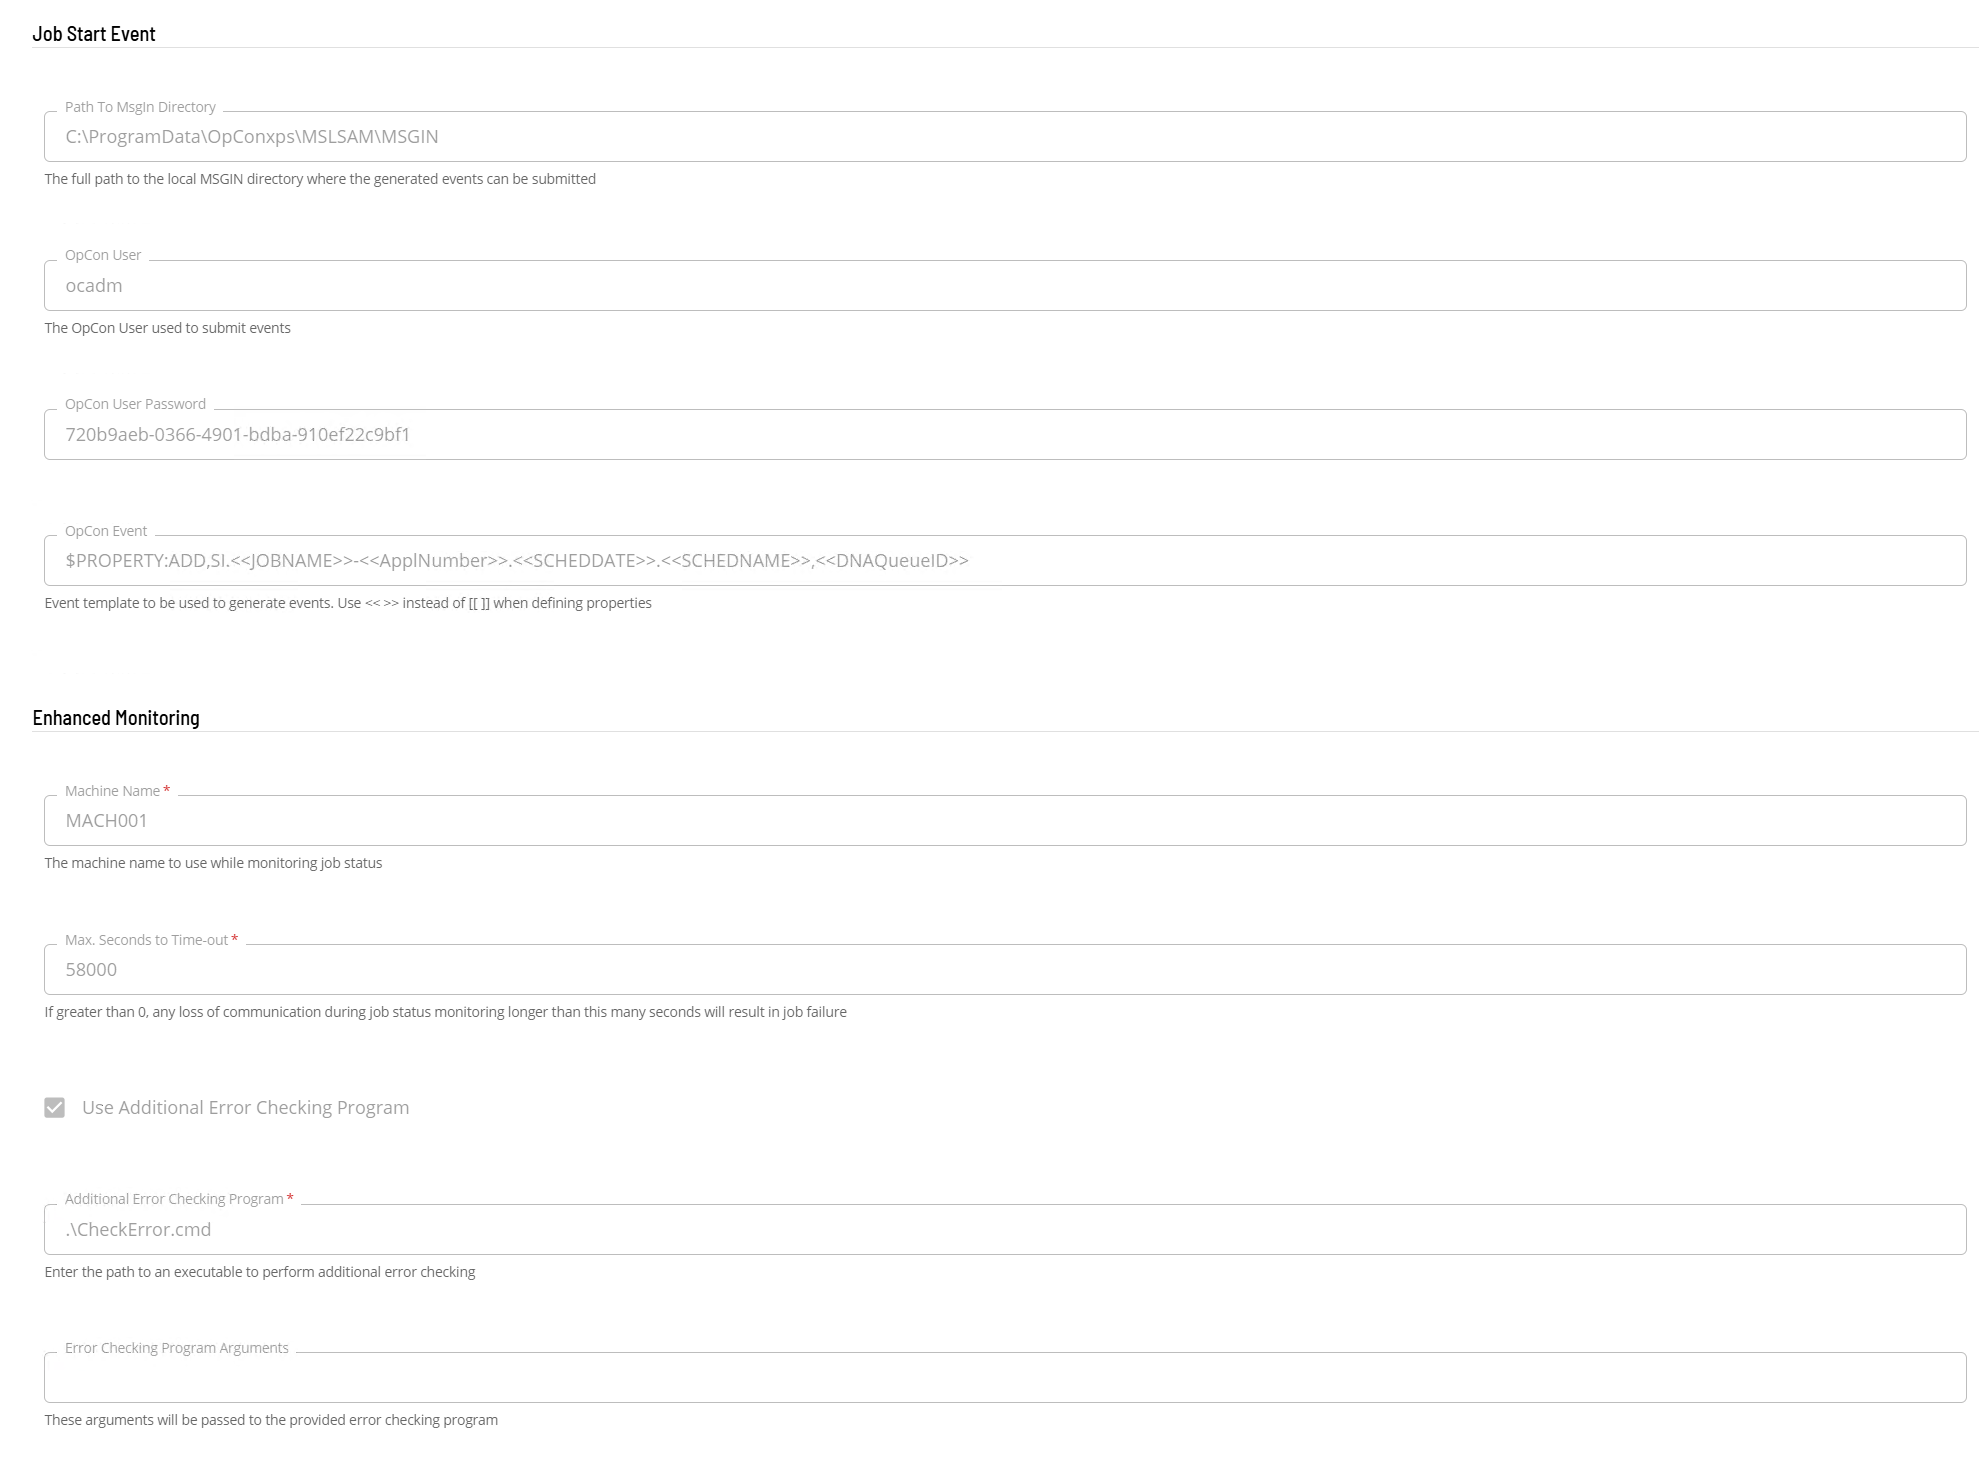
Job Start Event
- In the Path To Msgin Directory field enter the path to the msgin directory of the associated Windows Agent.
- In the OpCon User field enter the OpCon user that will be used to submit the event.
- In the OpCon User Password field enter the external token of the OpCon user that will be used to submit the event.
- In the OpCon Event field enter the event template to be used. If OpCon properties are defined in the template definition use
<< >>pairs instead of[[ ]].
Enhanced Monitoring
- In the Machine Name field enter the name of the machine to use while monitoring.
- In the Max seconds to Time-out field enter the timeout value.
- If required, select Use Additional Error Checking Program.
- In the Additional Error Checking Program field enter the path to an executable to perform the additional error checking.
- In the Error Checking Program Arguments field enter arguments that will be passed to the error checking program.
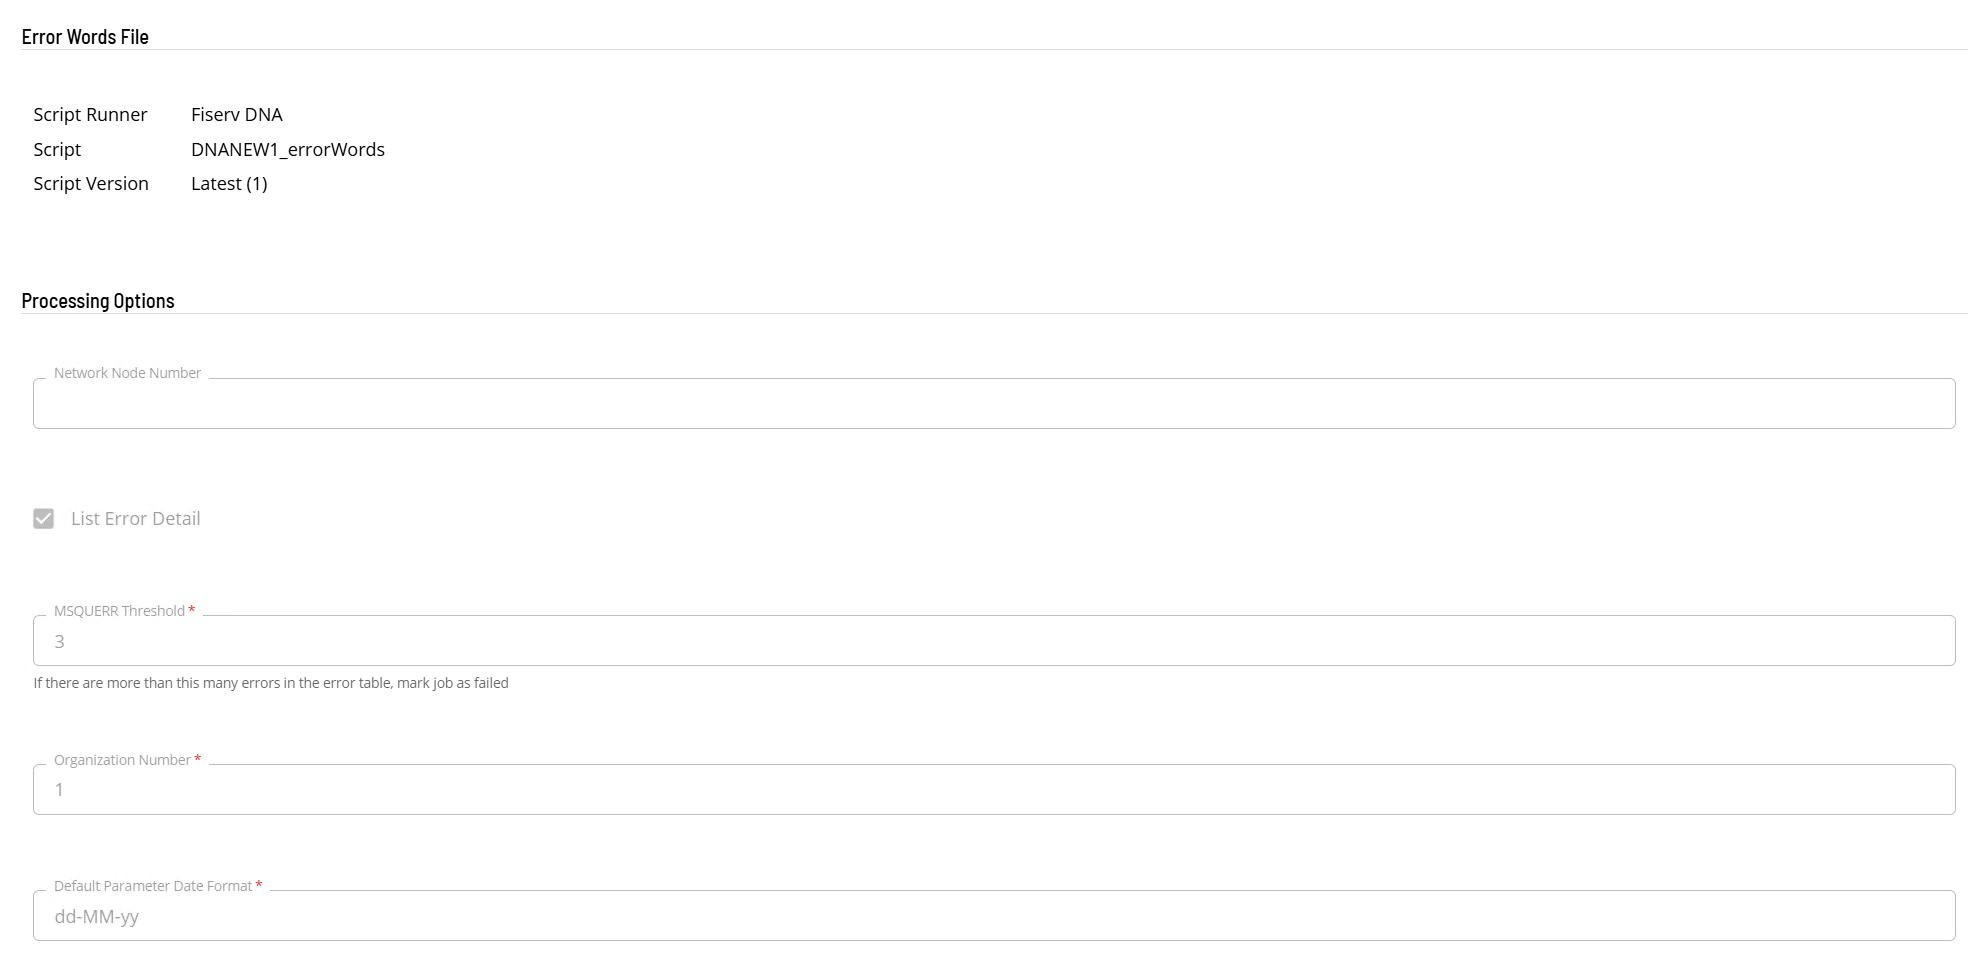
Error Words File
In the Error Words File section select the script containing the error words file information.
Processing Options
- In the Network Node Number field enter the node number.
- If required, select List Error Detail.
- In the MSQUERR Threshold field enter the number of errors in the error table to mark a job as failed.
- In the Organization Number field enter the organization number.
- In the Default Parameter Date Format field enter the default date definition.
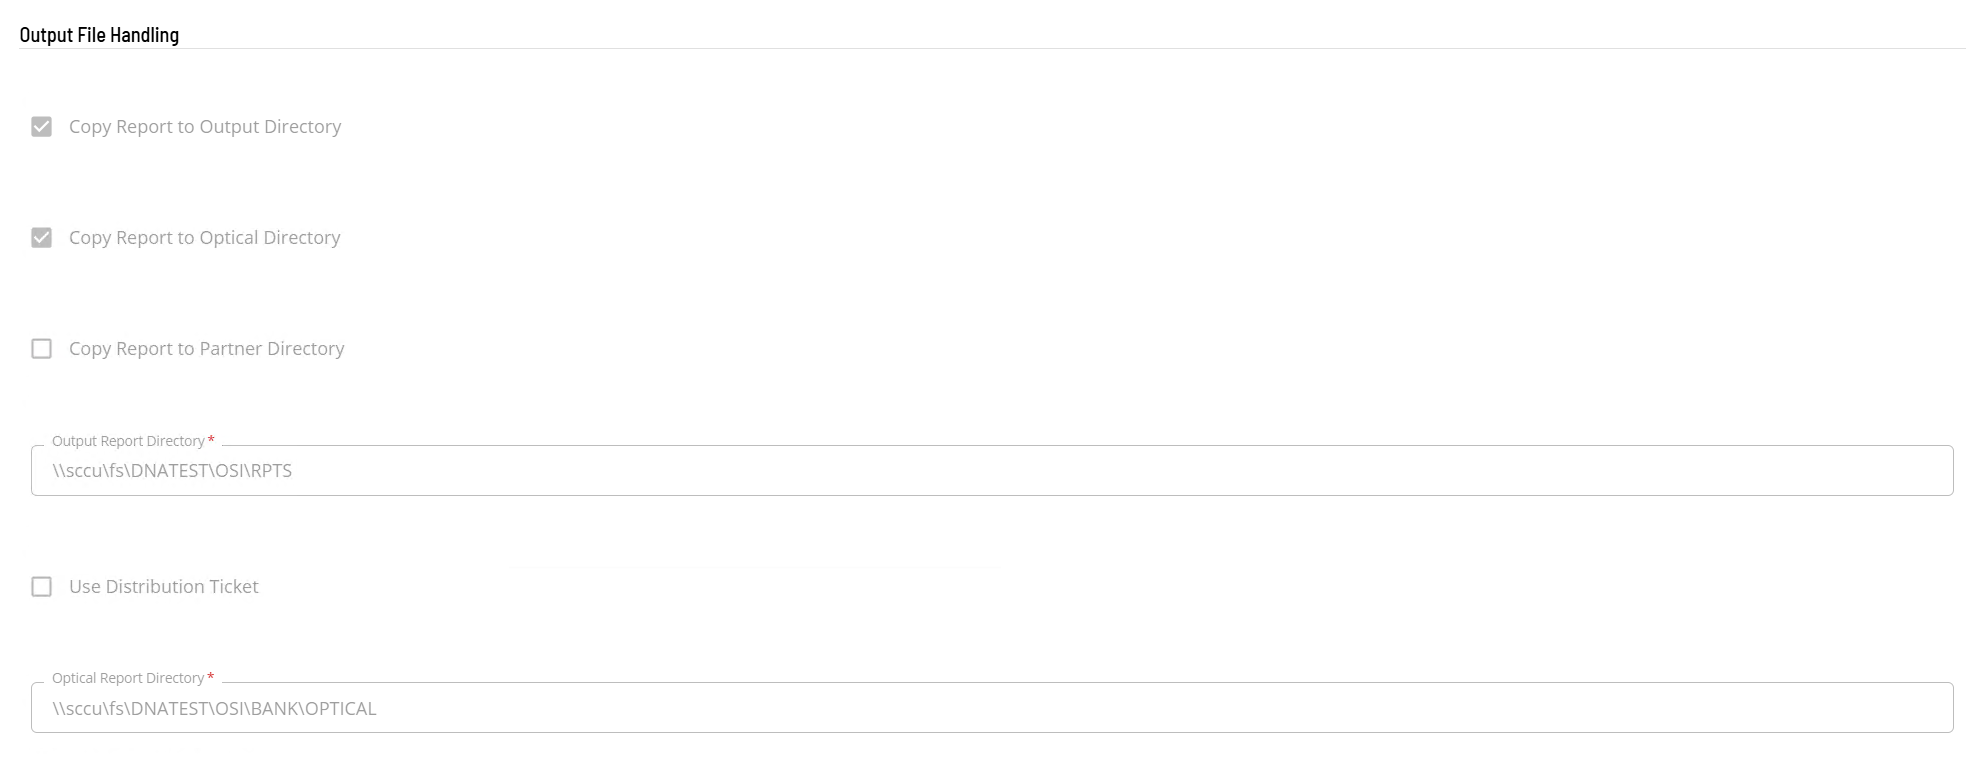
Output File Handling
- If required, select Copy Report to Output Directory.
- If required, select Copy Report to Optical Directory.
- If required, select Copy Report to Partner Directory.
- In the Output Report Directory field enter the directory information.
- If required, select Use Distribution Ticket.
- In the Optical Report Directory field enter the directory information.
Save and activate
- Select Save to save the definition changes.
- Select the Change Communication Status button and select Enable Full Comm to start the connection.