Viewing and Updating Resource Dependencies
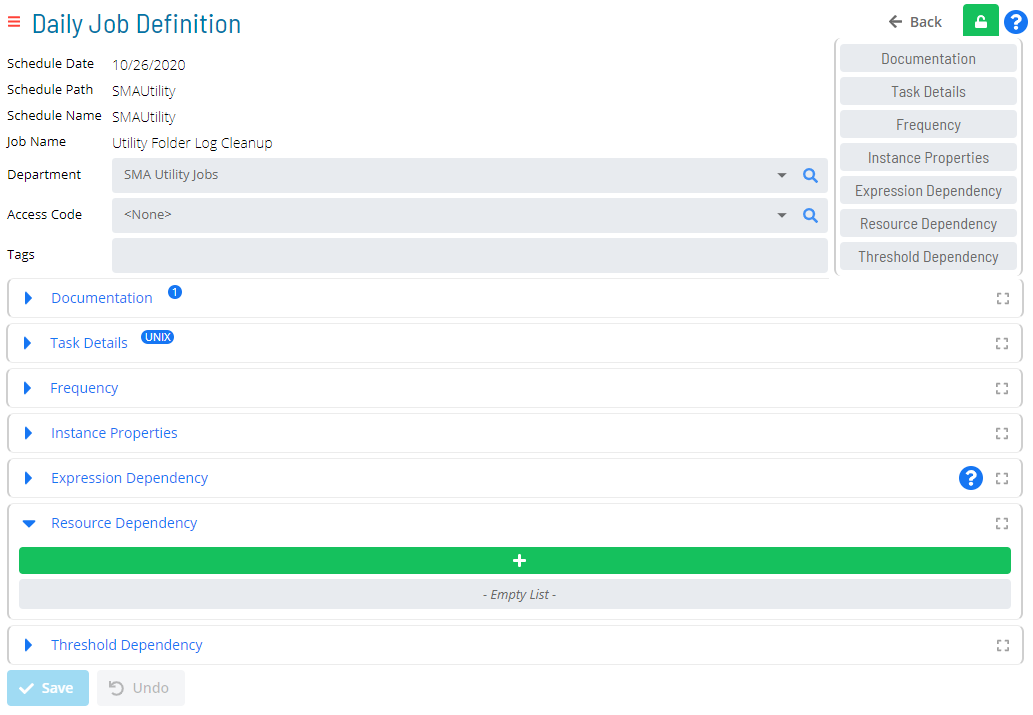
The Resource Dependency panel in Daily Job Definition displays any defined resource dependencies related to the selected job.
- The panel can be placed in Full Screen mode by simply clicking
the icon (
) to the far-right side of the panel bar. Escape Full Screen mode by clicking on the icon again.
- When the panel contains defined properties, a blue circular
indicator containing a number (
) will appear to the right of the panel name to indicate the number of properties that have been defined.
Adding or Updating Resource Dependencies
In Admin mode, resource dependencies can be updated. For conceptual information, refer to Threshold/Resource Dependencies in the Concepts online help.
Only those with the appropriate permissions will have access to the Lock button and can update job properties. For details about privileges, refer to Required Privileges in the Accessing Daily Job Definition topic.
Changes made to the job properties in the Daily Job Definition will take place immediately. If the job has already run, the changes will take effect the next time the job runs.
To perform this procedure:
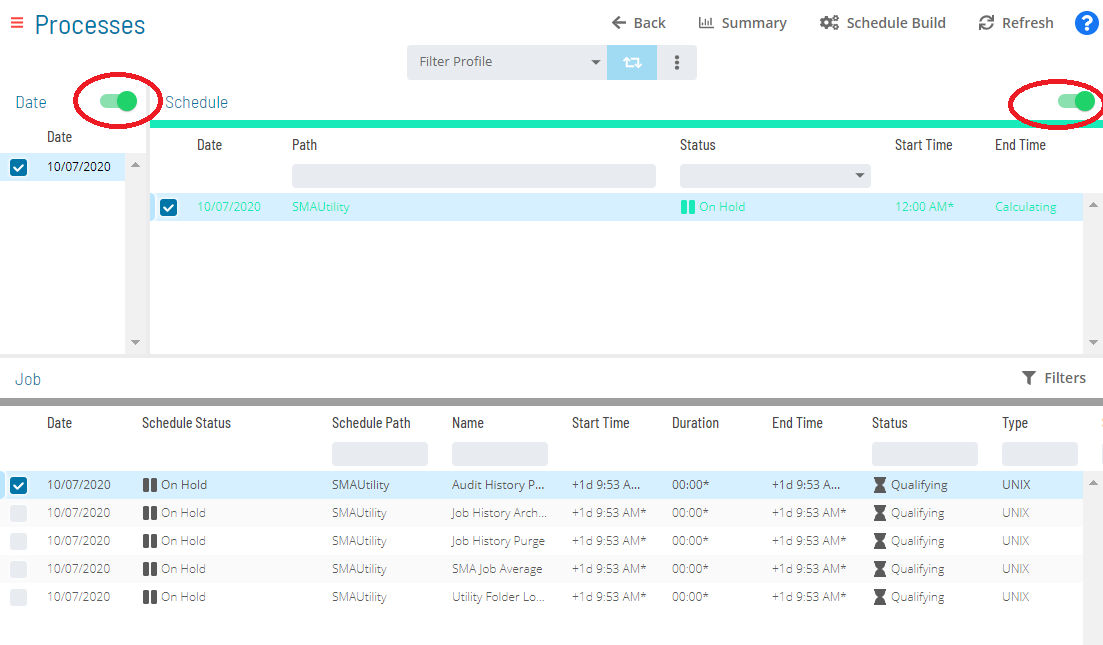
Click on the Processes button at the top-right of the Operations Summary page. The Processes page will display.
Ensure that both the Date and Schedule toggle switches are enabled so that you can make your date and schedule selection, respectively. Each switch will appear green when enabled.

Select the desired date(s) to display the associated schedule(s).
Select one or more schedule(s) in the list.
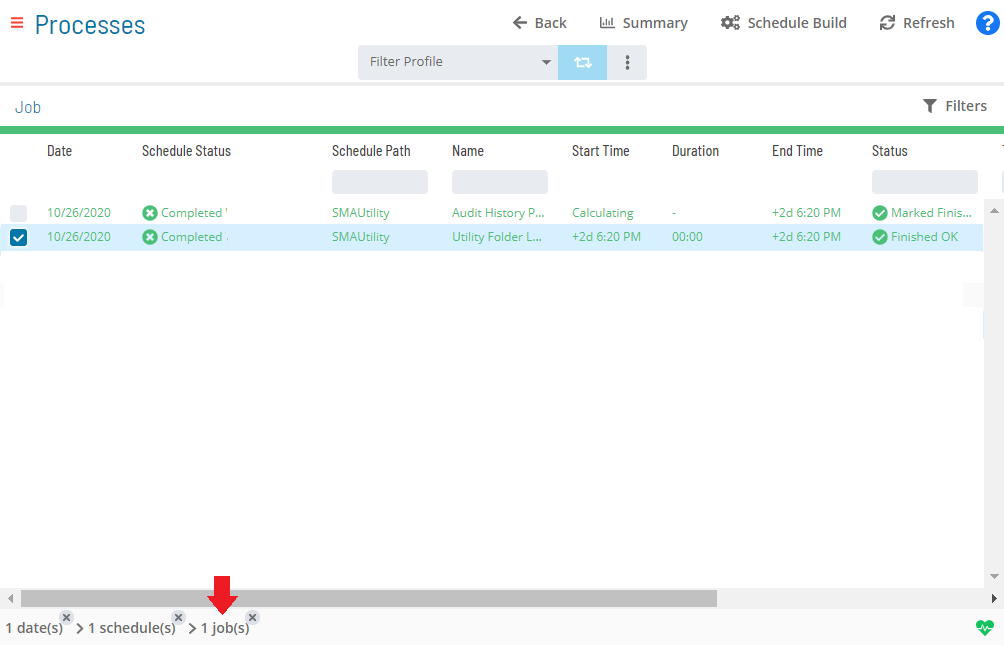
Select one job in the list. A record of your selection will display in the status bar at the bottom of the page in the form of a breadcrumb trail.

Click on the job record (e.g., 1 job(s)) in the status bar to display the Selection panel.
As an alternative, you can right-click on the job selected in the list to display the Selection panel.
-f5a1a0f534189eaf4359e46f29dacb2e.png)
Click the Daily Job Definition button
at the top-left corner of the panel to access the Daily Job
Definition page. By default, this page will be in Read-only mode.
Click the Lock button
at the top-right corner to place the page in Admin mode. The button
will switch to display a white lock unlocked on a green background
when enabled.
The Lock button will not be visible to users who do not have the appropriate permissions.
Expand the Resource Dependency panel to expose its content.

Do any of the following to make updates:
Edit or delete any existing resource dependencies if necessary.
Click the green Add button (+) to define a new resource dependency. When the Resource Dependency dialog displays:
- Select the name of the resource from drop-down list.
- Select the Requires All checkbox to specify that the job must consume all resources when it runs or select the number of resources (Value) that the job requires.
- Click Save to save your selections and close the dialog.
Indicators
The defined resource dependency will appear in the Resource Dependency panel with visual indicators, similar to the graphic, that indicate whether or not the dependency is in good standings, if what is required for the job is available to that job.

Appears green if the resource defined is correct. For example, when the current resource value is > 1 and the defined value is 2.
Appears red if the resource defined is not correct. For example, when the current resource value is = 1 and the defined value is 2.
Available resources are displayed to the right as Available (resource available/resource total).
The SAM will check to make sure the number of available resources is greater than the number required before the dependency is met.
Click the Undo button if you wish to undo your changes for any reason.
Click the Save button.