Adding Master Schedules
Required Privileges
n/a
Adding a Schedule
To add a Master Schedule, go to Studio
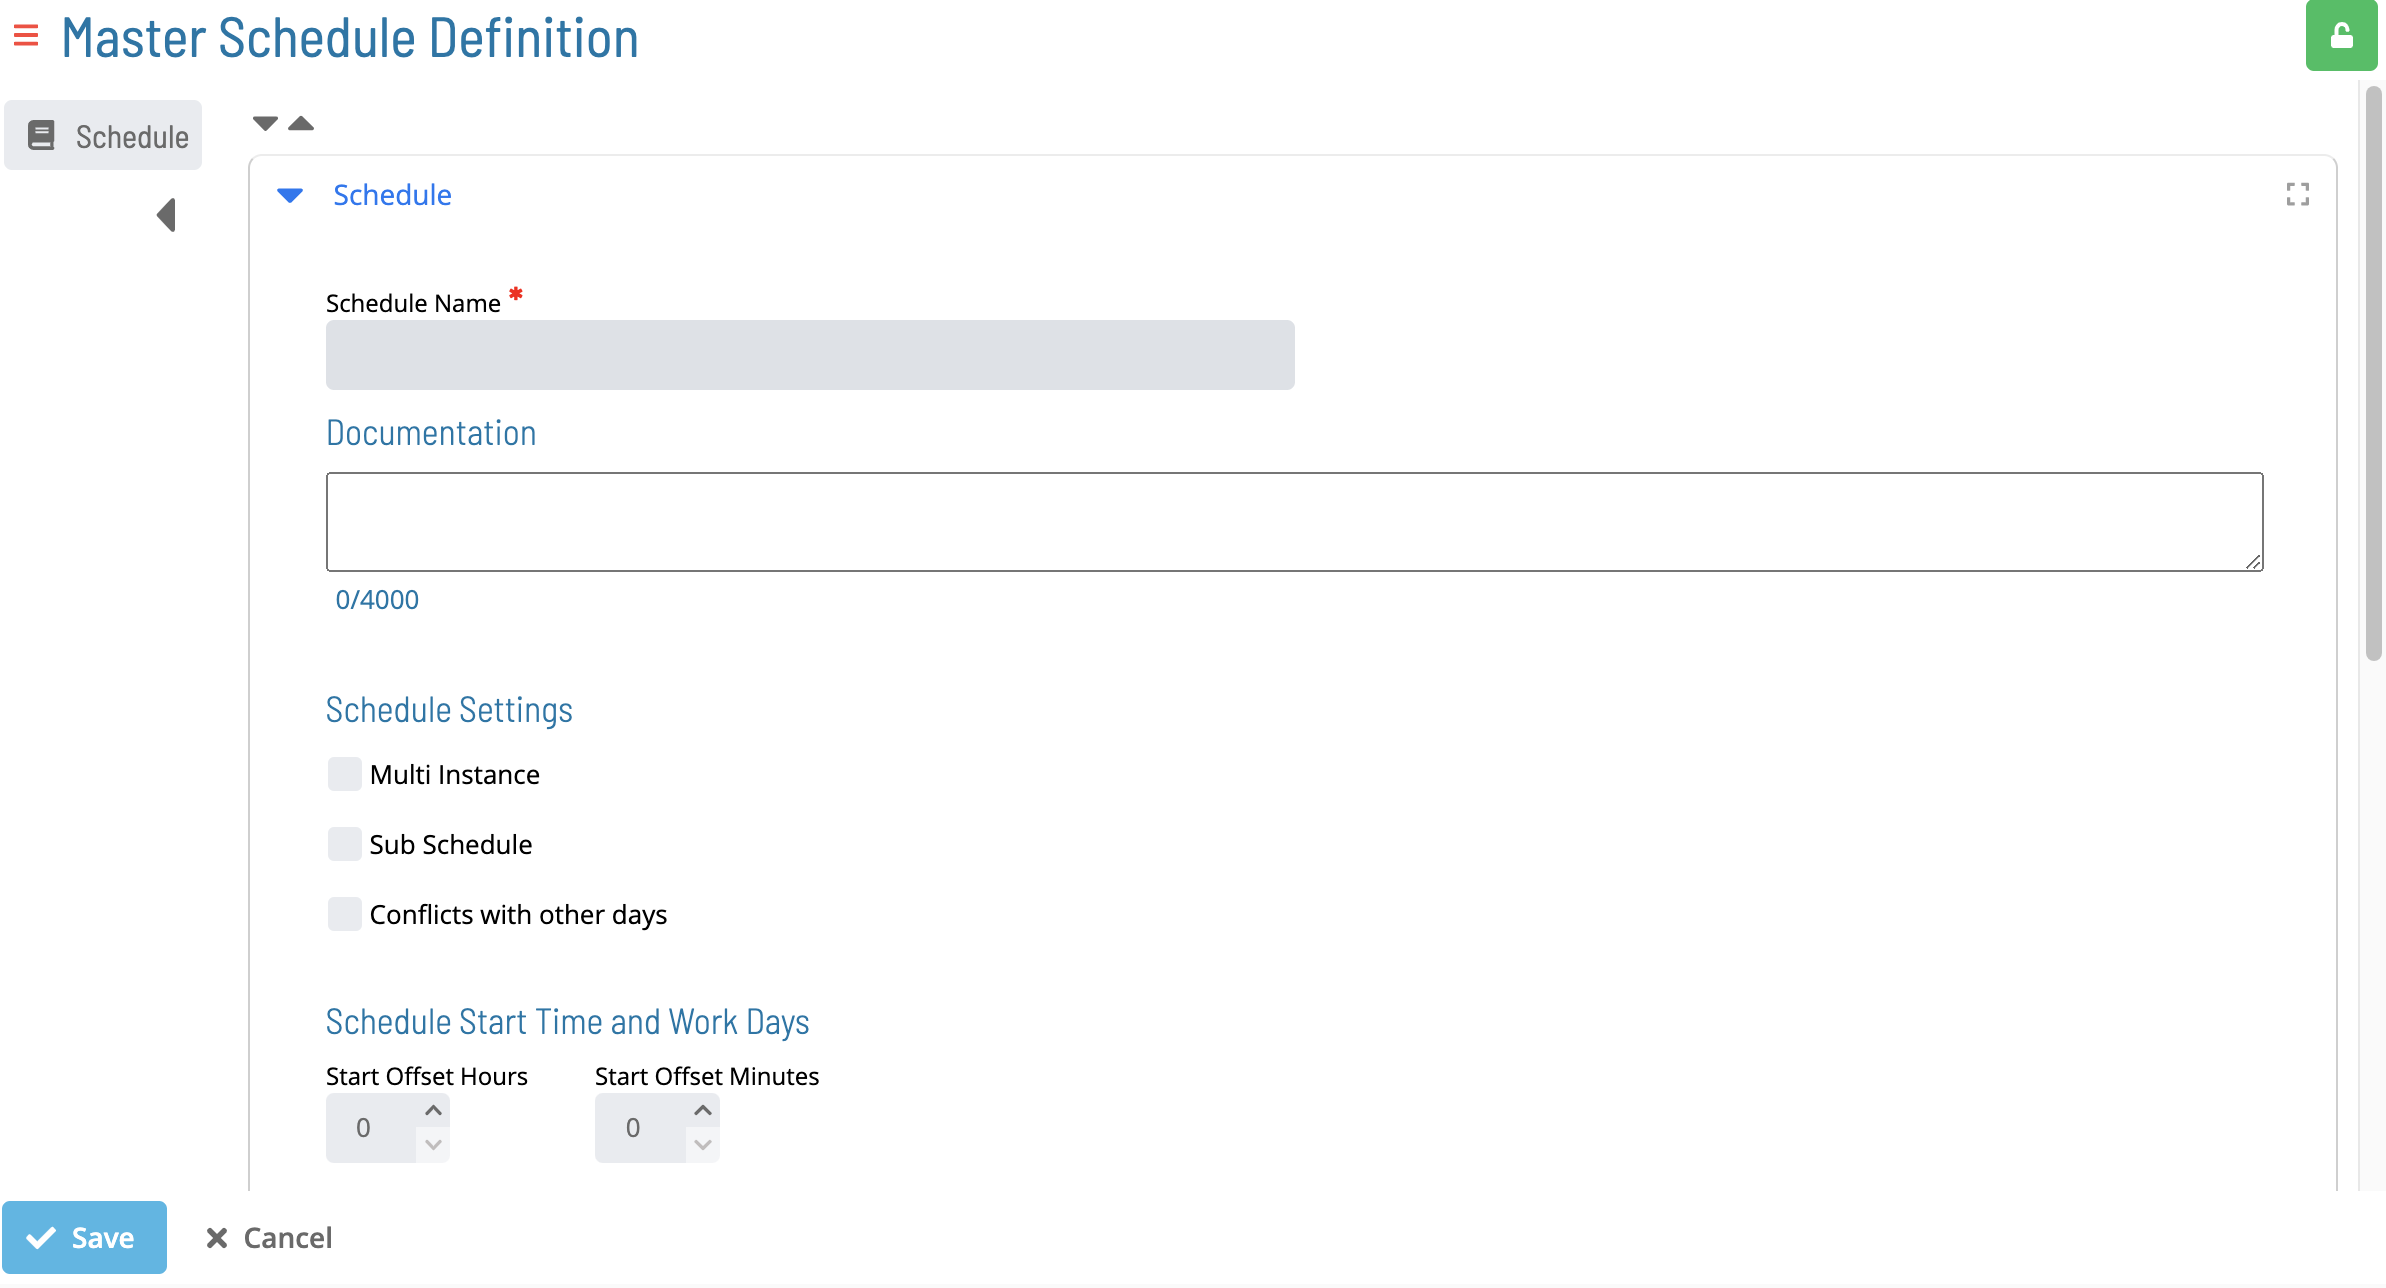
Select Add. The Create Master Schedule page is displayed:

Adding Schedule Name and Documentation
Select a Schedule Name. For more information, refer to Schedules in the Concepts online help.
(Optional) Enter the Documentation details. For more information, refer to Schedule Details in the Concepts online help.
Adding Schedule Settings
(Optional) Select the Multi Instance checkbox.
(Optional) Select the Sub Schedule checkbox. Note: Selecting this option will reset and disable all autobuild settings (i.e., auto build and auto delete)
(Optional) Select the Conflicts with other days checkbox.
Adding Schedule Start Time and Work Days
Enter the Start Offset Hour
Enter the Start Offset Minutes
Select the Workdays
Holiday Calendar Settings
(Optional) Select Additional Holidays.
(Optional) Select the Use Master Holiday checkbox.
Schedule Build and Maintenance
For more information, refer to Schedule Maintenance in the Concepts online help. Note: the autobuild checkbox and all autobuild settings (i.e., auto build and auto delete) will reset and become disabled when the sub-schedule checkbox is selected
(Optional) Select the Auto Build checkbox. For more information, refer to Build Settings in the Concepts online help.
Note: Selecting this checkbox will un-disable Auto Build settings
Enter the # of Days in Advance.
Enter the # of Days to build for.
Enter the Build Offset Hours.
Enter the Build Offset Minute.
(Optional) Select the Overwrite checkbox.
(Optional) Select the Build on Hold checkbox.
Select Save to create the schedule or Cancel to cancel the operation.