Set Up Secure TLS Communication With UNIX LSAM
This article will show you how to set the TLS communication for your UNIX LSAM, this feature is only available for a UNIX LSAM installed with a tar file suffixed by *_SSL.tar
All screenshots in this article come from a CentOS system, UNIX LSAM LSAM_19.0.7_Redhat_RHEL6.1_64_SSL.tar, Windows Server 2012 R2 (for the windows part), and here LSAM is using port 21100 (3100 is usually the default port).
We'll use in this example an auto signed certificate.
Create the certificate
Open a putty connection or a ssh connection to reach your Unix/Linux terminal :
cd /usr/local/lsam-19.0.7
cd bin
./lsam21100 create_cert (By default 365 but we can go until 3650):
[root@CentOS-BEN bin]# ./lsam21100 create_cert
Generating self-signed certificate CentOS-BEN.globalsma.com.pem valid for 365 days
Generating a 2048 bit RSA private key
...........................+++
..........+++
writing new private key to 'CentOS-BEN.globalsma.com.pem'
-----
You are about to be asked to enter information that will be incorporated
into your certificate request.
What you are about to enter is what is called a Distinguished Name or a DN.
There are quite a few fields but you can leave some blank
For some fields there will be a default value,
If you enter '.', the field will be left blank.
-----
Country Name (2 letter code) [XX]:FR
State or Province Name (full name) []:LO
Locality Name (eg, city) [Default City]:NCY
Organization Name (eg, company) [Default Company Ltd]:SMA
Organizational Unit Name (eg, section) []:Support
Common Name (eg, your name or your server's hostname) []:CentOS-BEN (important : hostname, fqdn, or generic like *.globalsma.com)
Email Address []:bbernard@smatechnologies.com
CentOS-BEN.globalsma.com.pem successfully created.

Exporting CentOS-BEN.globalsma.com.pem to Windows format PKCS#12 file CentOS-BEN.globalsma.com.pfx
Enter Export Password:
Verifying - Enter Export Password:
CentOS-BEN.globalsma.com.pfx successfully created.
Configure your UNIX LSAM
[root@CentOS-BEN bin]# ./lsam21100 config
Configuring the LSAM services:
Checking current configuration file (/usr/local/lsam-19.0.7/config/21100/lsam.conf)...


       1) TCP/IP configuration parameters
       2) Lsam Configuration Parameters
       3) Logging configuration parameters
       4) Dispatcher configuration parameters
       5) JORS and SMAFT parameters
       6) sma_filein parameters
       7) Trace option parameters
       8) Blacklist parameters
       9) Whitelist parameters
       10) SFTP parameters
       11) FAD parameters

       s) Save changes

       q) Quit

               Enter choice -> 1


       Enter allowed_sam_ip_address_1      [any] :
       Enter allowed_sam_ip_address_2      [unused] :
       Enter allowed_sam_ip_address_3      [unused] :
       Enter allowed_sam_ip_address_4      [unused] :
       Enter allowed_sam_ip_address_5      [unused] :
       Enter bound_NIC_adapter_ip          [default] :
       Enter use_TLS_SAM (0=no, 1=yes)     [0] : 1
       Enter lsam_pem_file (full pathname) [none] : /usr/local/lsam-19.0.7/ssl/CentOS-BEN.globalsma.com.pem
       Enter lsam_private_key_file         [none] : /usr/local/lsam-19.0.7/ssl/CentOS-BEN.globalsma.com.pem
       Enter netcom_pem_file               [none] :
Change the port of the SMAFT on the option 5 of the list menu because SMAFT cannot have the same port than the JORS in TLS mode enabled.
Then save and quit.
(Certificate files here are in a ssl folder, by default they are created in bin directory)
On Windows side
Copy the pfx file on your OpCon server
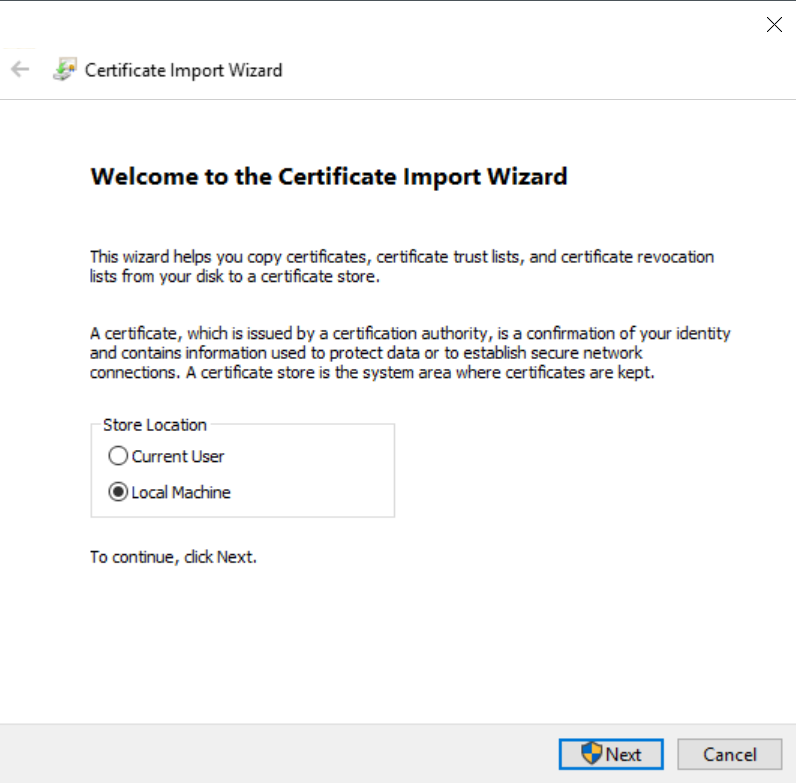
Save the pfx on your server by double-clicking on it:
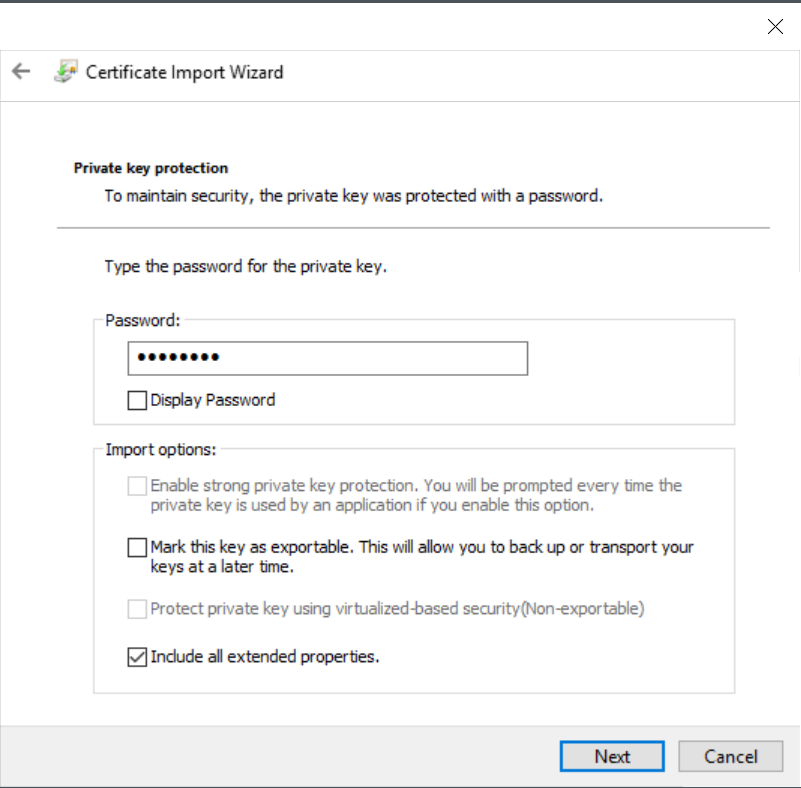
Then type next, and type the password of your private key:
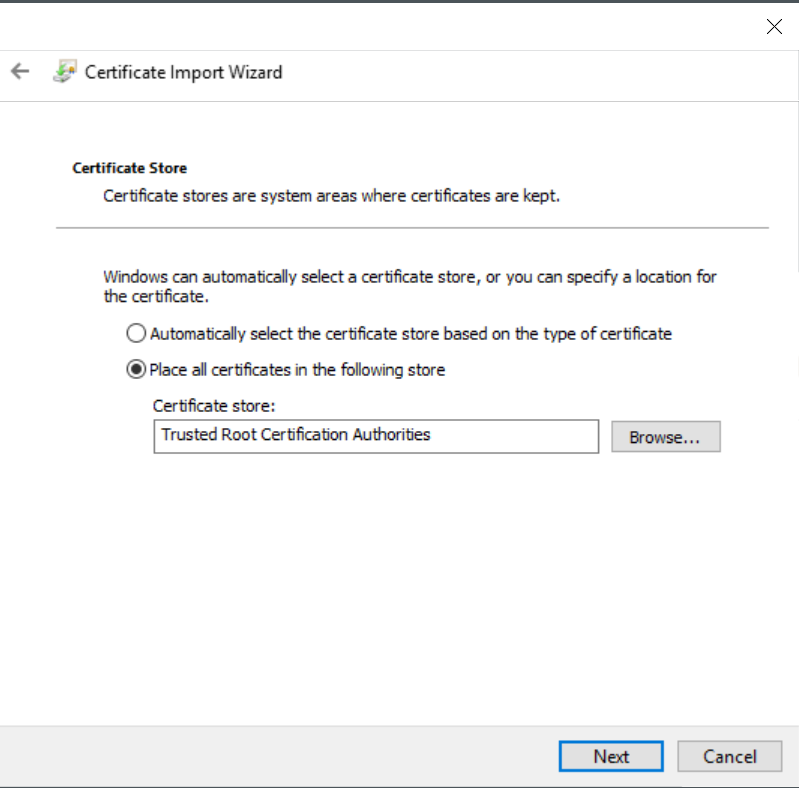
Type next, and store your certificate to the Trusted Root Certification Authorities:
At the end you should get a message to confirm the import of your certificate.
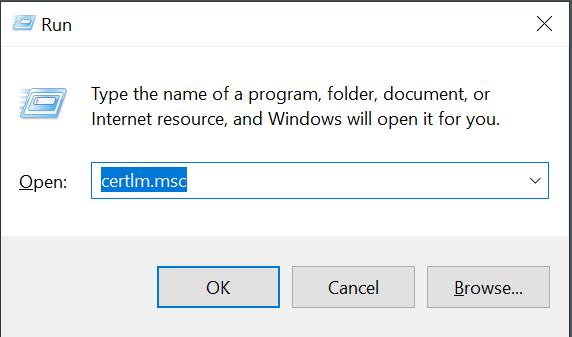
Now, go to the certificate manager:
Once opened, expend the Trusted Root Certification Authorities:
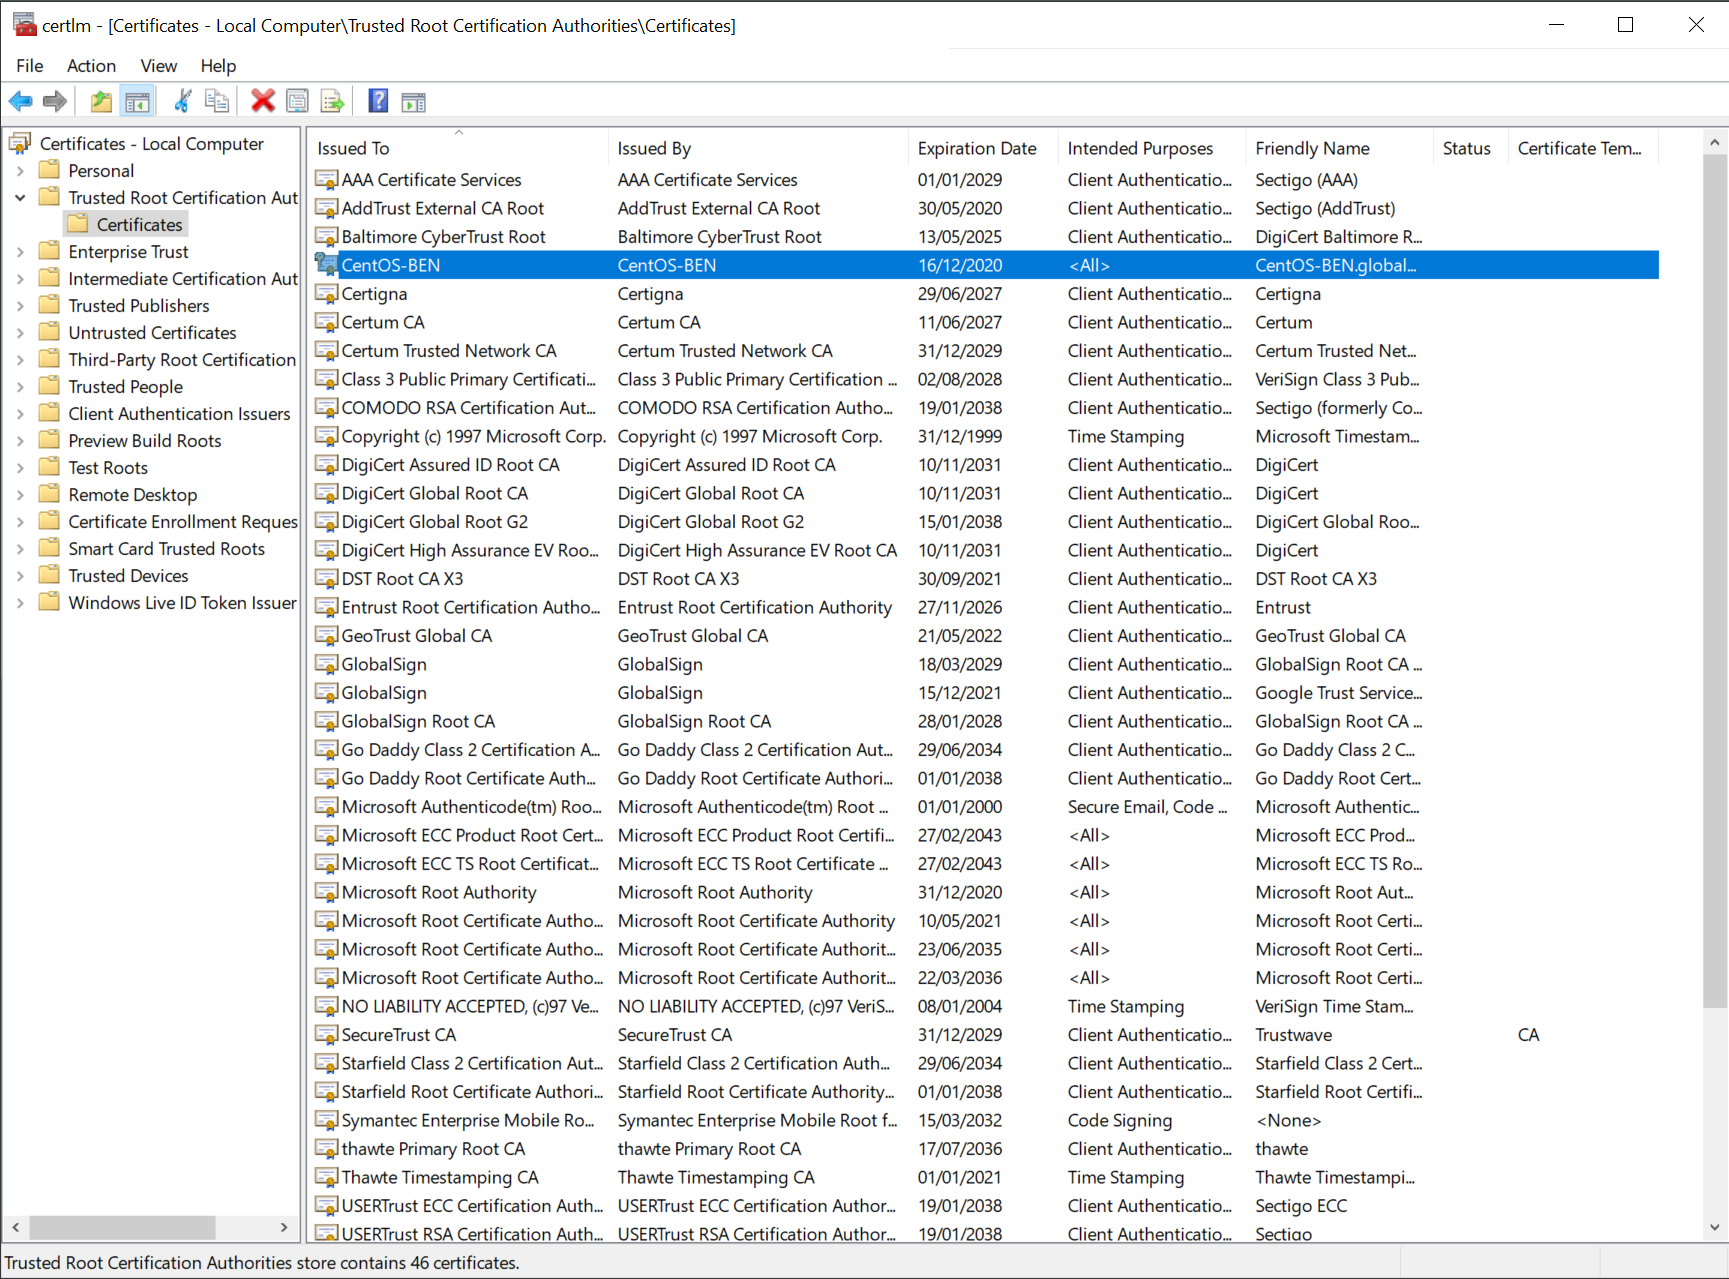
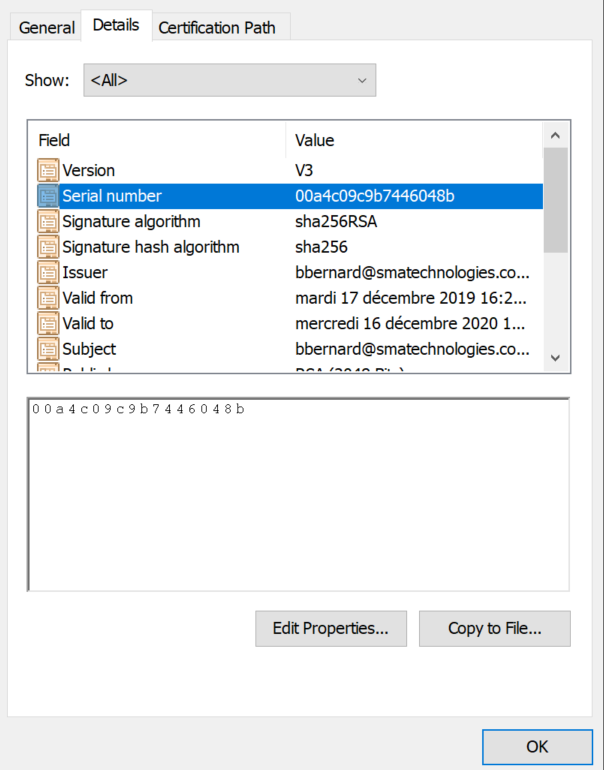
Find and select your certificate and open it by double clicking on it
In the details tab you will find the serial number, keep it aside:
Go to the Enterprise Manager, Machines, select your machine, put down the communication if it is enabled, Open advanced settings, communication settings tabs:

Set Use TLS for Scheduling Communications to true
Set TLS Certificate Serial Number with the serial number we found on step above
Update and save.
Restart your UNIX agent ./lsam21100 restart
Starting LSAM services on port=21100 with LSAM_instance=21100. SMA VERSION= 19.0.7 SSL-capable

Pre-start validation completed.

--- Starting logging daemon
sma_log - PID file (/usr/local/lsam-19.0.7/pid/21100/sma_log.pid) successfully created.
--- Starting lsam daemon
sma_lsam - PID file (/usr/local/lsam-19.0.7/pid/21100/sma_lsam.pid) successfully created.
***** This LSAM supports IPV6.
--- Starting dispatcher daemon
sma_disp - PID file (/usr/local/lsam-19.0.7/pid/21100/sma_disp.pid) successfully created.
***** LSAM health monitor started...
--- Starting CronMon
sma_cronmon - PID file (/usr/local/lsam-19.0.7/pid/21100/sma_cronmon.pid) successfully created.
--- Starting Filein
sma_filein - PID file (/usr/local/lsam-19.0.7/pid/21100/sma_filein.pid) successfully created.
--- Starting sma_JORS
sma_JORS - PID file (/usr/local/lsam-19.0.7/pid/21100/sma_JORS.pid) successfully created.
--- No SMA_RM Config File found -- not starting SMA_RM
--- No config files specified for the FAD. Exiting...

LSAM started at Tue Dec 17 10:50:50 EST 2019
Go back to the Enterprise Manager and start the communication of your machine, it should be up, and check the SMANetcom log, the log should display:
17/12/2019 16:51:56:404


**********************************************************
                  Configuration Parameters Loaded For [CentOS7-19.0.7]
                   General
                                      Fully Qualified Domain Name = <Default>
                                     *TCP/IP Address = 10.1.7.108 (<Default>)
                                      OS Type = UNIX
                                      SMA NetCom Identifier = <Default>
                                      SMA Communications Protocol = Contemporary, XML
                                     *Use TLS For Scheduling Communications = TRUE (FALSE)
                                      Check Certification Revocation = FALSE
                                     *Server TLS Certificate Serial Number = 00a4c09c9b7446048b (NONE)
                                      LSAM Gateway Name = <None>
                                      LSAM Max Jobs = 50
                                      LSAM Current Jobs = 0
                                     *JORS Port Number = 21110 (0)
                                      Check CRC = TRUE
                                      Close Socket During Synchronization = FALSE
                                     *Allow "Kill Job" = TRUE (FALSE)
                                      Requires XML Escape Sequences = FALSE
                                     *Supports Handshake Messages when idle = TRUE (FALSE)
                                     *LSAM Socket Number = 21100 (3100)
                                      LSAMConnectionMarkedUp = TRUE
                                      LSAMConnectionMarkedLimited = FALSE
                   Logging
                                      LSAMTraceAllMessages = TRUE
                   Time Settings
                                      Time Zone Name = UNKNOWN
                                      Time Offset From UTC (Hours) = 1.00
                                      Connection Attempt Timeout (ms) = 1000
                                      Poll Interval (ms) = 1000
                                      Check Machine Status (sec) = 120
                                      Response Timeout (sec) = 30
                                      Consecutive Send Sleep Time (ms) = 100
                   Buffer Settings
                                      Max Consecutive Send Messages = 100
                                      Send Buffer Count = 25
                                      Receive Buffer Count = 25
                   File Transfer Settings
                                     *File Transfer Role = T (N)
                                     *File Transfer Port Number = 18110 (0)
                                     *Full File Transfer Support = TRUE (FALSE)
 17/12/2019 16:51:56:404 Connection exists for Machine CentOS7-19.0.7 calling SetConnectionParams
17/12/2019 16:51:56:404 This is a TLS socket, calling ProcessClient
17/12/2019 16:51:56:420 Server Certificate with Serial Number 00a4c09c9b7446048b found for ServerName : CentOS-BEN
17/12/2019 16:51:56:420 Authenticating with serverName = CentOS-BEN
17/12/2019 16:51:56:436 Server's authentication succeeded ...
17/12/2019 16:51:56:436 Cipher: Aes256 strength 256
17/12/2019 16:51:56:436 Hash: Sha384 strength 0
17/12/2019 16:51:56:436 Key exchange: RsaKeyX strength 2048
17/12/2019 16:51:56:436 Protocol: Tls12
17/12/2019 16:51:56:436 Is authenticated: True as server? False
17/12/2019 16:51:56:451 IsSigned: True
17/12/2019 16:51:56:451 Is Encrypted: True
17/12/2019 16:51:56:451 Certificate revocation list checked: False
17/12/2019 16:51:56:451 Local certificate is null.
17/12/2019 16:51:56:451 Remote cert was issued to E=bbernard@smatechnologies.com, CN=CentOS-BEN, OU=Support, O=SMA, L=NCY, S=LO, C=FR and is valid from 17/12/2019 16:29:11 until 16/12/2020 16:29:11
17/12/2019 16:51:56:451 Can read: True, write True
17/12/2019 16:51:56:451 Can timeout: True
17/12/2019 16:51:56:451 ***** Established a connection to [CentOS7-19.0.7] (10.1.7.108). It will be sending and receiving data. If succeeds, the machine will be marked up.
17/12/2019 16:51:56:467 ***** The machine [CentOS7-19.0.7] is marked up successfully.
 17/12/2019 16:51:56:905


**********************************************************
                  Configuration Parameters Loaded For [CentOS7-19.0.7]
                   General
                                      Fully Qualified Domain Name = <Default>
                                     *TCP/IP Address = 10.1.7.108 (<Default>)
                                      OS Type = UNIX
                                      SMA NetCom Identifier = <Default>
                                      SMA Communications Protocol = Contemporary, XML
                                     *Use TLS For Scheduling Communications = TRUE (FALSE)
                                      Check Certification Revocation = FALSE
                                     *Server TLS Certificate Serial Number = 00a4c09c9b7446048b (NONE)
                                      LSAM Gateway Name = <None>
                                      LSAM Max Jobs = 50
                                      LSAM Current Jobs = 0
                                     *JORS Port Number = 21110 (0)
                                      Check CRC = TRUE
                                      Close Socket During Synchronization = FALSE
                                     *Allow "Kill Job" = TRUE (FALSE)
                                      Requires XML Escape Sequences = FALSE
                                     *Supports Handshake Messages when idle = TRUE (FALSE)
                                     *LSAM Socket Number = 21100 (3100)
                                      LSAMConnectionMarkedUp = TRUE
                                      LSAMConnectionMarkedLimited = FALSE
                   Logging
                                      LSAMTraceAllMessages = TRUE
                   Time Settings
                                      Time Zone Name = America/Detroit
                                      Time Offset From UTC (Hours) = -5.00
                                      Connection Attempt Timeout (ms) = 1000
                                      Poll Interval (ms) = 1000
                                      Check Machine Status (sec) = 120
                                      Response Timeout (sec) = 30
                                      Consecutive Send Sleep Time (ms) = 100
                   Buffer Settings
                                      Max Consecutive Send Messages = 100
                                      Send Buffer Count = 25
                                      Receive Buffer Count = 25
                   File Transfer Settings
                                     *File Transfer Role = T (N)
                                     *File Transfer Port Number = 18110 (0)
                                     *Full File Transfer Support = TRUE (FALSE)
 17/12/2019 16:51:56:905 Connection exists for Machine CentOS7-19.0.7 calling SetConnectionParams
If you want to set a signed certificate this procedure is still valid as it shows where required options and fields are required for the TLS.