Performing Job Status Changes
The Operations module allows you to perform job status changes using a few simple steps.
To perform job status changes:
Click on one of the six operation dials (Failed, Blocked, Waiting, Running, Completed, or Ignored) or use the Quick Search field (type the keyword and click Enter) in the Jobs section on the Operations Summary page.

The "Ignored" operation dial groups any job with a job status of Cancelled or Skipped.
The Processes page will display.
(Optional) Filter and/or sort the list of jobs displayed.
Filtering:
a. For quick filtering, you
can use the Filter Bar just above the list of jobs to filter the
list. You simply type the keyword in the appropriate field and click
Enter, and the list will filter accordingly.
b. For alternative filtering, use the
interactive color-coded Statistics Bar above the list of jobs to
filter the list by status. Click on any color in the bar to filter
the view by the current job status.
c. For more in-depth filtering, you can use
the
button to display the Filter panel then filter the list of jobs
by job status, tag, department, or access code. The filter button
icon will change to dark yellow and also display the number of
filters currently turned on (
).
Click on the x at the top-right corner of the button to remove
all selected filters at once.
Sorting:
Click on the column heading to sort the column in ascending order (indicated by a small arrow pointing down). Click on the column heading again to sort the column in descending order (indicated by a small arrow pointing up).
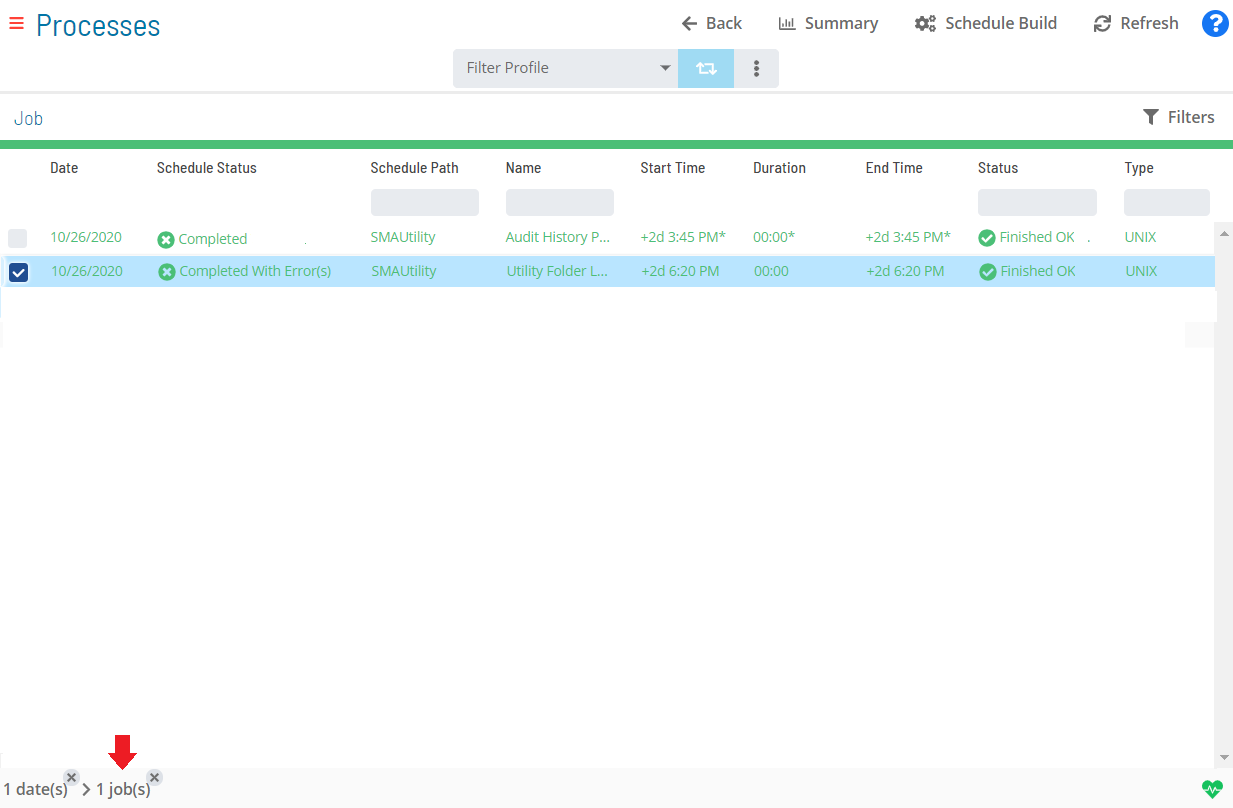
Select any job(s) in the list. A record of your selection(s) will display in the status bar at the bottom of the page in the form of a breadcrumb trail.

Click on the job record (e.g., 1 job(s)) in the status bar to display the Selection panel.
As an alternative, you can right-click on any job selected in the list to display the Selection panel.
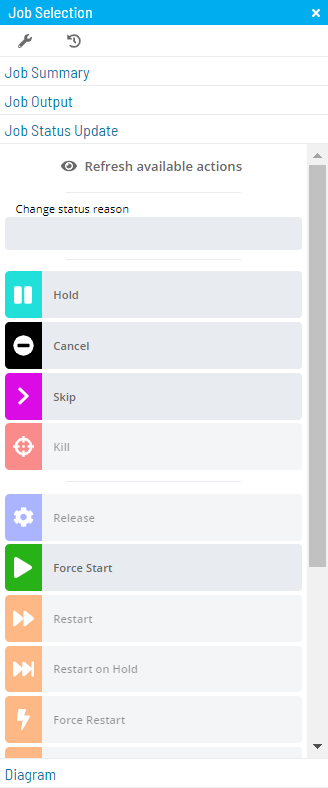
Select the Job Status Update accordion-style tab in the panel.

(Optional) Click the Refresh available actions button to verify which status update actions are available for the current selection. This option is particularly helpful when more than one job has been selected since all status update buttons are enabled by default.
(Optional) Enter or select a change status reason.
Depending on application configuration, the Change Status Reason drop-down list may store a number of the previous reasons entered for Job or Schedule status updates.
Select one of the following status updates to apply to the selected job(s):
- Hold: This option allows you to place the selected job(s) on hold.
- Cancel: This option allows you to cancel the selected job(s). The job does not process unless manually started by a user or an event.
- Skip: This option allows you to place the selected job(s) in a Job to be Skipped state until the job(s) qualify to start. When the job(s) qualify, they are skipped and the job dependencies of all subsequent jobs are met.
- Kill: This option allows you to send a request to abort one ore more jobs on an Agent machine. If the kill is successful, the application reports the killed job as Failed. If the Kill is not successful, the job continues to show a Running status in the application.
- Release: This option allows you to release the selected job(s) from a Held state.
- Force Start: This option allows you to force start the selected job(s). This causes the job(s) to ignore all dependencies, and to start immediately.
- Restart: This option allows you to place the selected job(s) back in a Qualifying state. All dependencies must be met before the job(s) are submitted.
- Restart on Hold: This option allows you to place the selected job(s) back in a Qualifying state, and the job(s) will process when all dependencies have been met.
- Force Restart: This option allows you to force restart the selected job(s) and ignore the start time and all dependencies. The job(s) restart as soon as this option is selected as long as a machine is available.
- Restart On Step: This option allows you to select a step on which to restart a job. This option can only be triggered if the job type supports this feature and there is an available list of steps in the database returned by the Agent during runtime.
- Mark Finished OK: This option allows you to change the selected job(s) to a Finished OK status regardless of the job's current status. All events are processed as if the job(s) had Finished OK without intervention. If a job is Marked Finished OK before it starts, both the start and finish time saved in history equal the time the job is marked.
- Mark Failed: This option allows you change the selected job(s) to a Failed status regardless of the job's current status. All events are processed as if the job(s) had failed without intervention. If a job is Marked Failed before it starts, both the start and finish time saved in history equal the time the job is marked.
- Mark Under Review: This option allows you to change the selected job(s) to an Under Review status (and being worked on) when the job is in a Failed, Marked Failed, or Initialization Error state.
- Mark Fixed: This option allows you to change the selected job(s) to Fixed status when the job is in a Failed, Marked Failed, Initialization Error, or Under Review state.
For more information about job status changes, refer to Schedule and Job Status Change Commands in the Concepts online help.
Close the Selection panel when done.
Related Topics