Managing Schedules
The
button on the main Operations page takes you to the Schedule
Build page where you can manage building schedules.
Operations Summary Page
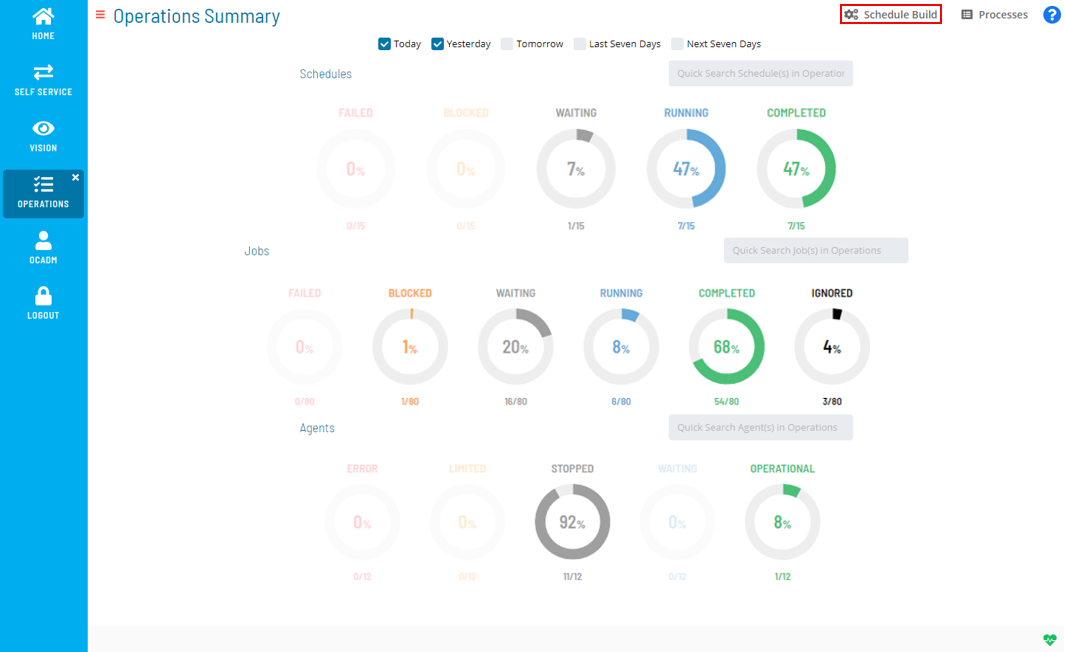
There are several pages that you can use to build and manage schedules. These next subsections describe these options in detail.
Selection Options
Schedule Build Selection Page
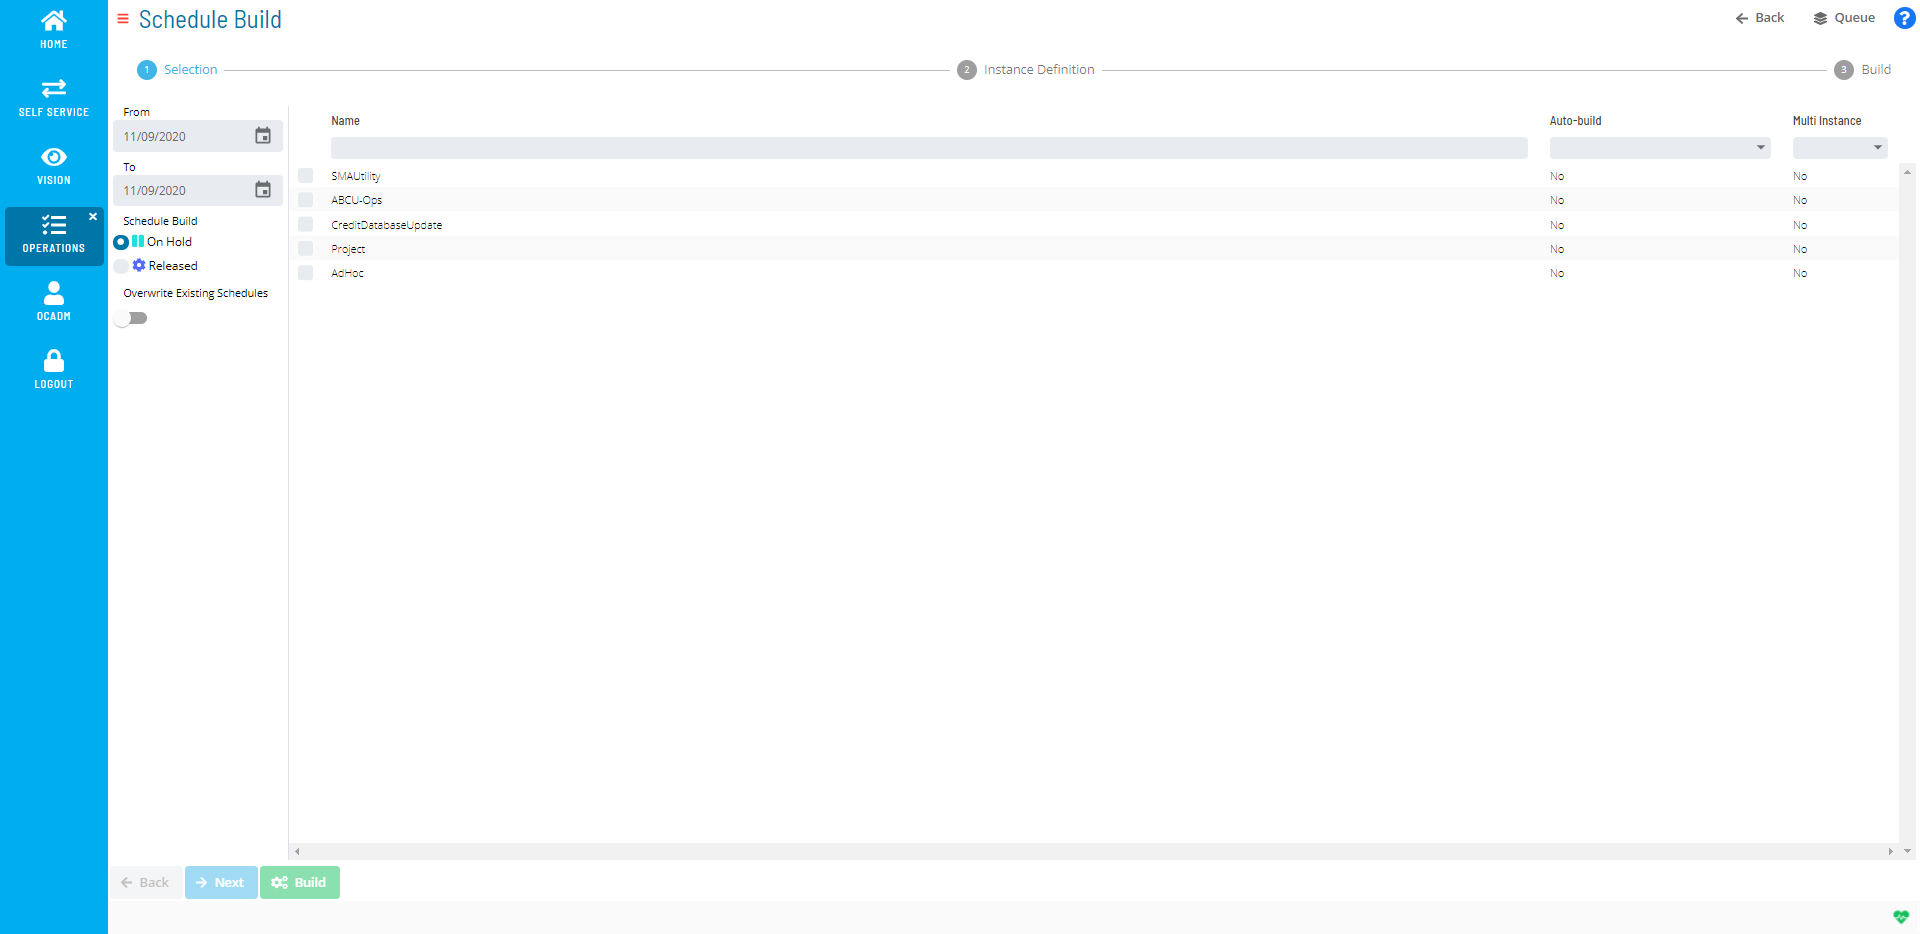
The Selection page has the following selection options for building a master schedule:
- From: This field allows you to select the earliest date from which to build a schedule.
- To: This field allows you to select the latest date from which to build the schedule.
- Schedule Build: These radio buttons allow you to select the
state in which the schedule will build.
- On Hold: Indicates if the schedule should be built with a status of On Hold. The SAM will not process the schedule until it is released manually or through an OpCon event.
- Released: Indicates if the schedule will be released at build time.
- Overwrite Existing Schedules: When the auto build executes and
the schedule is found on the target date, this toggle switch
indicates if the schedule should be overwritten. When this setting
is on, OpCon overwrites the schedule if it is in a
Completed status. If the schedule is In Process, it will not be overwritten. The toggle
switch will appear red
when enabled.
- Name: This field defines the name of the schedule. Select the
checkbox
to the left of the schedule name for all schedules to be built. For quick filtering, use the Filter Bar just above the schedule name list to filter the list. Type the keyword and click Enter, and the list will filter accordingly.
- Auto-build: This field filters the schedule results based on whether the jobs is set to auto build, with options Yes or No. If Yes, the number of days in advance details for the auto build will be indicated.
- Multi Instance: This field filters the schedule results based on whether the jobs is a multi-instance schedule, with options Yes or No.
- Back (bottom-left): This button returns to the previous page. This button is disabled on the Selection page.
- Next: This button progresses to the next page.
- Build: This button builds the schedule(s).
- Back (top-right): This button returns to the Operations Summary page.
- Queue: This button opens the Schedule Build Queue page.
Instance Definition Options
Schedule Build Instance Definition Page
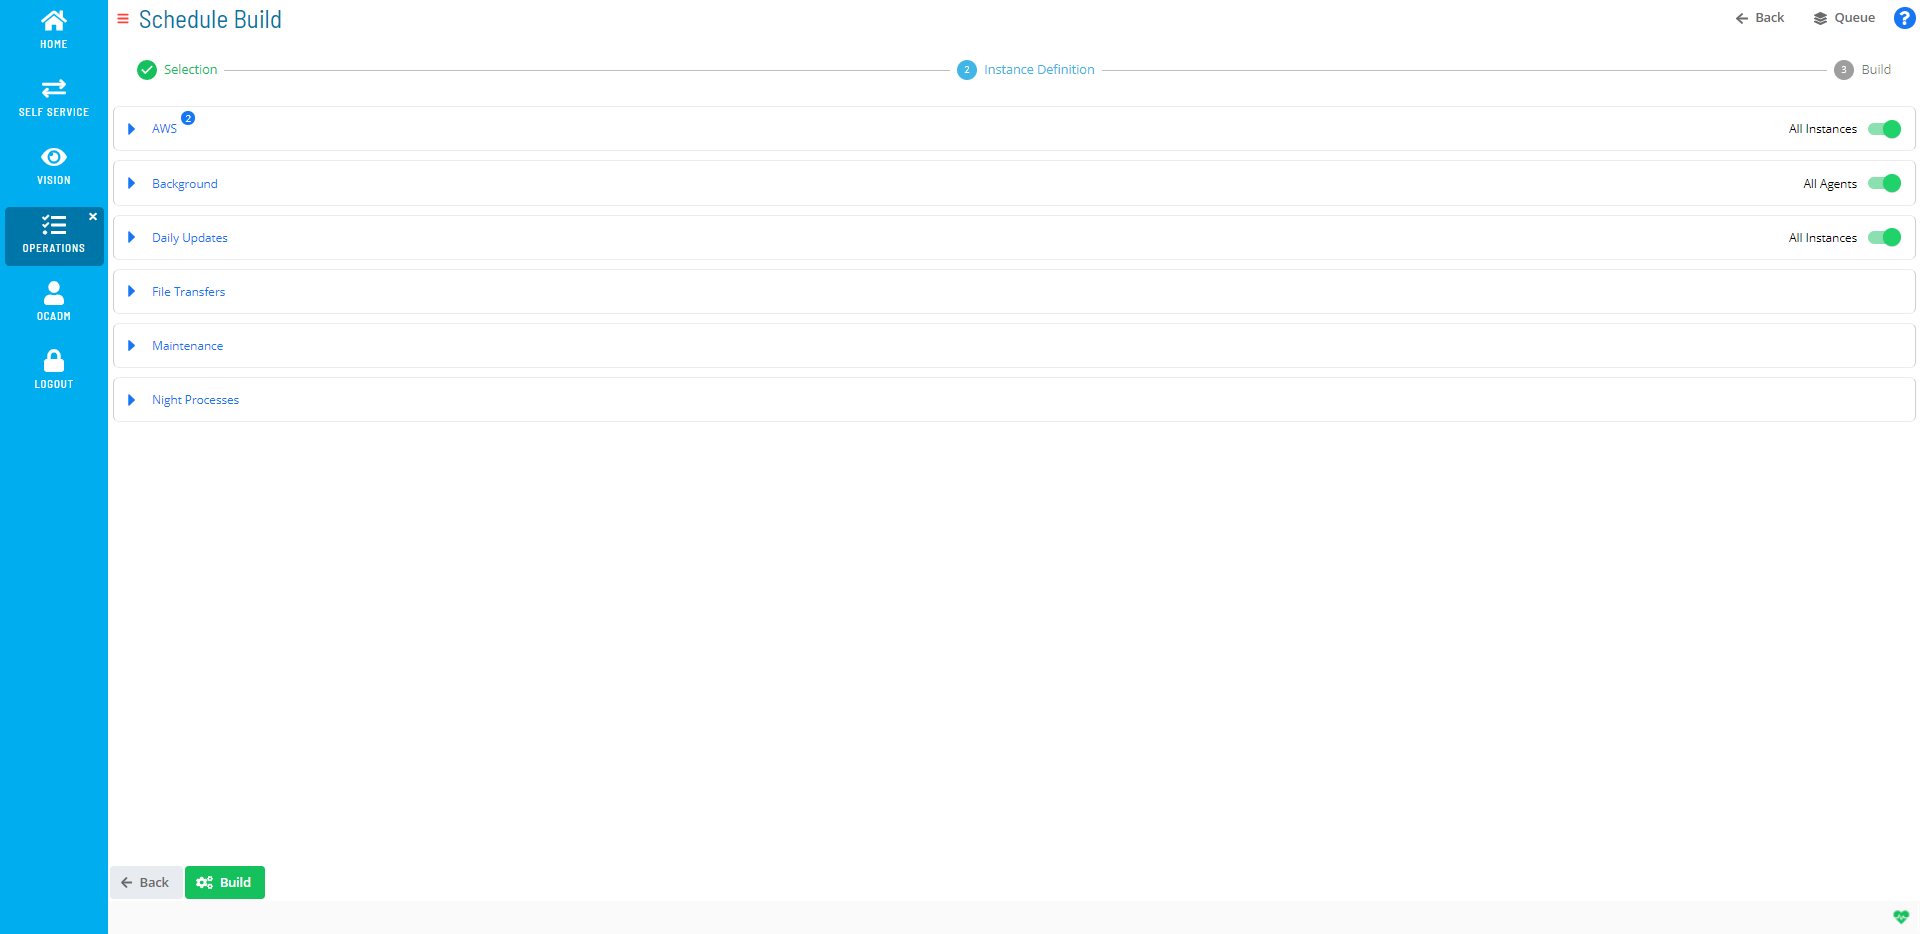
The Instance Definition page has the following instance definition options for building a master schedule:
- For non-multi-instance schedules:
- Name: This field allows you to define the property name. If the schedule being processed has no defined instances, (refer to Instance Definition ), the user can enter property definitions for an instance of a specific schedule. For additional information, refer to Properties.
- Value: This field allows you to define the property value.
- For multi-instance schedules:
- All Instances (Properties/Named Instance): This frame allows
you to select or define properties or named instances for the
multi-instance schedule. When all instances should be built, the
All Instances toggle switch will appear green
when enabled. A white number in a blue circle (
) will display next to the schedule name if multiple instances are defined for the schedule.
- Name: This field allows you to define the instance name or property. If the schedule being processed has no defined instances (refer to Instance Definition ), the user can enter property definitions for an instance of a specific schedule. For additional information, refer to Properties.
- Value: This field allows you to define the property value.
- All Agents (Machine Group): This frame allows you to select
or define a machine group for the schedule. When all machines
should be built, the All Agents toggle switch will appear green
when enabled. A white number in a blue circle (
) will display next to the schedule name if multiple instances are defined for the schedule.
- Machine: This field allows you to select the machine group.
- All Instances (Properties/Named Instance): This frame allows
you to select or define properties or named instances for the
multi-instance schedule. When all instances should be built, the
All Instances toggle switch will appear green
- Back (bottom-left): This button returns to the previous page.
- Build: This button builds the schedule(s).
- Back (top-right): This button returns to the Operations Summary page.
- Queue: This button opens the Schedule Build Queue page.
Build Options
Schedule Build Page
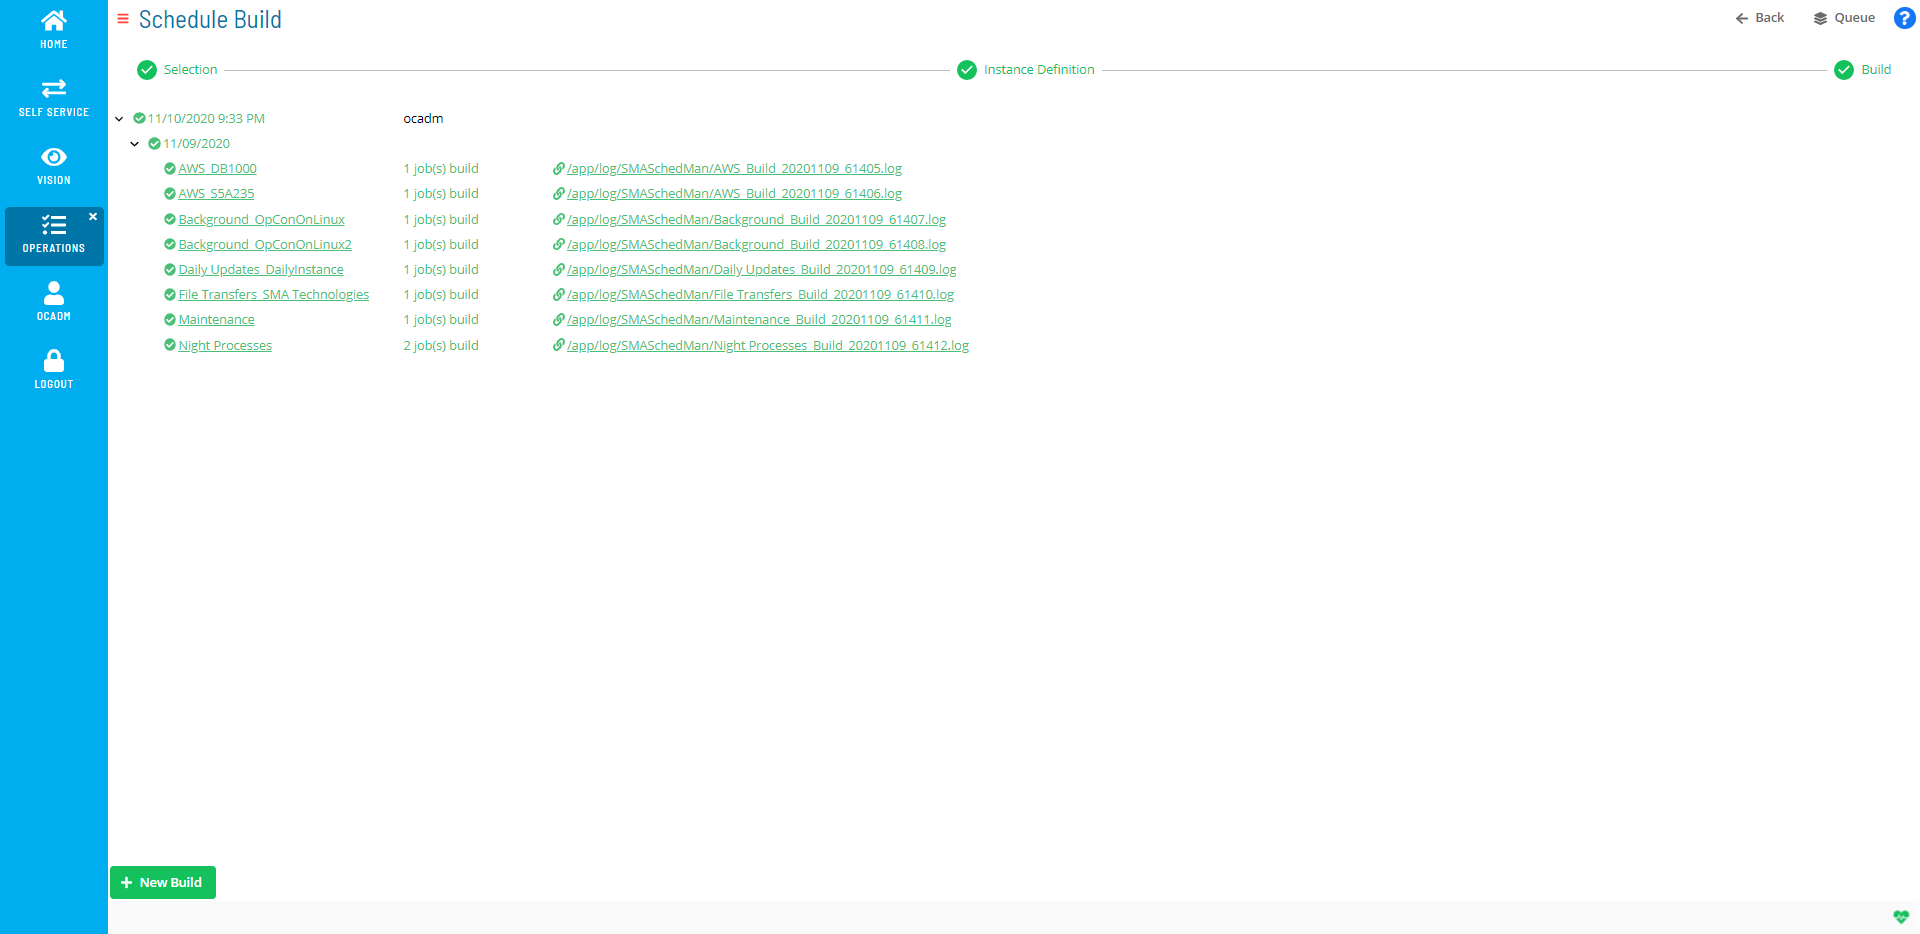
The Build page displays the schedules during building and once
complete. Clicking the schedule name will open the
Processes page. Clicking the .log
path following the link icon ()
will display the build log.
Schedule Build Log
Schedule Build Log
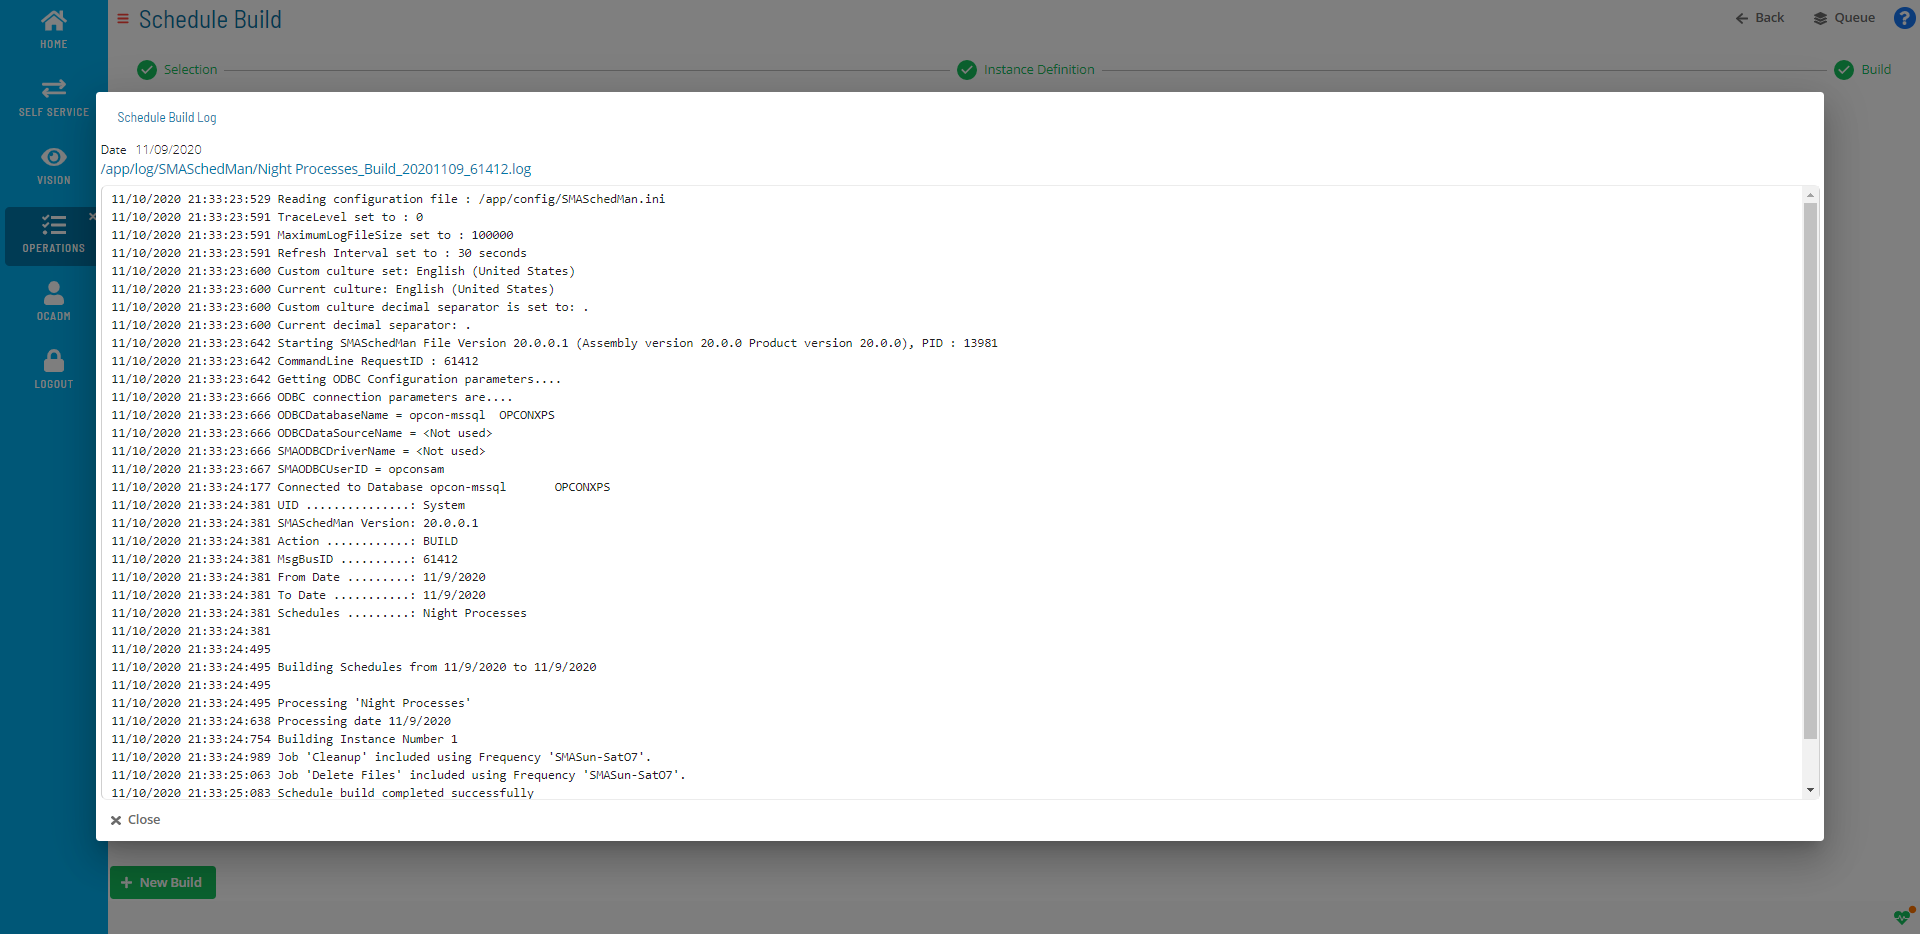
The Schedule Build Log window displays the path to the log file and log information for the build.
Building Schedules
To build a schedule:
- Click the Schedule Build button (
) on the Operations Summary page.
- Enter or select a start date in the From field.
- Enter or select an end date in the To field.
- Select either the On Hold or the Released radio button to define the build state.
- Toggle the Overwrite Existing Schedules toggle switch to define whether to overwrite existing built schedules. The option is disabled by default.
- Select the checkbox
next to all schedules to be built.
- Select one of the following options: a. (Optional) Click Next button to go to the Instance Definition page (then proceed to step 8) - or - b. Click the Build button to build the schedule(s) (then proceed to step 18).
- Click the green plus (Add) button in the expanded frame to define an instance.
- Enter a name and value for the property. a. (Optional) Click the blue check mark (OK) button to add the instance property. b. (Optional) Click the reverse arrow (Undo) button to clear the fields. c. (Optional) Click the green plus (Add) button to add an additional instance property. d. (Optional) Click the blue pencil (Edit) button or click in the Name or Value fields to edit an instance property. e. (Optional) Click the red trash can (Delete) button to delete an instance property.
- (Optional) Edit the existing instance definition by clicking the blue pencil (Edit) button or clicking in the Name or Value fields.
- (Optional) Click the green plus (Add) button to define an additional instance property. a. Enter a name and value for the property. b. (Optional) Click the blue check mark (OK) button to add the instance property. c. (Optional) Click the reverse arrow (Undo) button to clear the fields. d. (Optional) Click the green plus (Add) button to add an additional instance property. e. (Optional) Click the blue pencil (Edit) button or click in the Name or Value fields to edit an instance property. f. (Optional) Click the red trash can (Delete) button to delete an instance property.
- (Optional) Toggle the All Instance switch to define whether to build all instances of the properties.
- Select a machine in the Machine drop-down.
- (Optional) Toggle the All Agents switch to define whether to build all agents.
- Click the Build button to build the schedule(s).
- (Optional) Click the schedule name to view the Processes information.
- (Optional) Click the .log file link to view the job log.
Related Topics